Welcome to our guide on setting up your Google Workspace Professional Email. Whether you’re an entrepreneur, a small business owner, or part of a larger organization, having a professional email address is crucial for effective communication and brand representation. Google Workspace, formerly known as G Suite, offers a powerful and versatile email solution that integrates seamlessly with other Google applications, enhancing productivity and collaboration.
In this guide, we’ll walk you through the step-by-step process of setting up your Google Workspace Professional Email. We’ll cover everything listed below.
- Getting a domain name
- Signing up for Google Workspace
- Activating Gmail with Domain
- A/B testing of email service
- 10% discount on email services
Remember, no question is too basic, and this guide is designed to make the setup process smooth and straightforward, even if you’re not overly tech-savvy.
So, let’s get started and unlock the full potential of your professional communication with Google Workspace!
Get a Domain Name to Create Professional Emails Addresses
You need a domain name in order to create professional emails. For example, if your domain name is “xyz.com”, you can create “contact@xyz.com”, “sales@xyz.com”, etc. with it (up to 300 email addresses with Google Workspace).
So first and foremost, you need a domain name for your business to use Google Workspace professional email service. If you don’t have one, please watch this video. If you already have one, you can simply skip this step.
Getting a domain name is very easy from Godaddy, Namecheap, or any other popular registrar. We recommend GoDaddy because we found that it’s easier to set up a Godaddy domain name with Google Workspace.
Also read: What is Google Workspace Email?
Now that you have your own domain name, you need a Google Workspace account. Later, we will set up Gmail with the domain name to create professional emails.
Sign Up on Google Workspace for Professional Emailing
We need a Google Workspace account so that can use the professional email (Gmail) services on the go. Getting a Google Workspace account is easy and only requires a few steps. We have explained every step in brief and with ease. Shall we?
So, after getting the domain name for your business, you will need to create a Google Workspace Admin account. It’s an easy process, just follow the steps.
Total Time Required 25 minutes
1. Visit Google Workspace
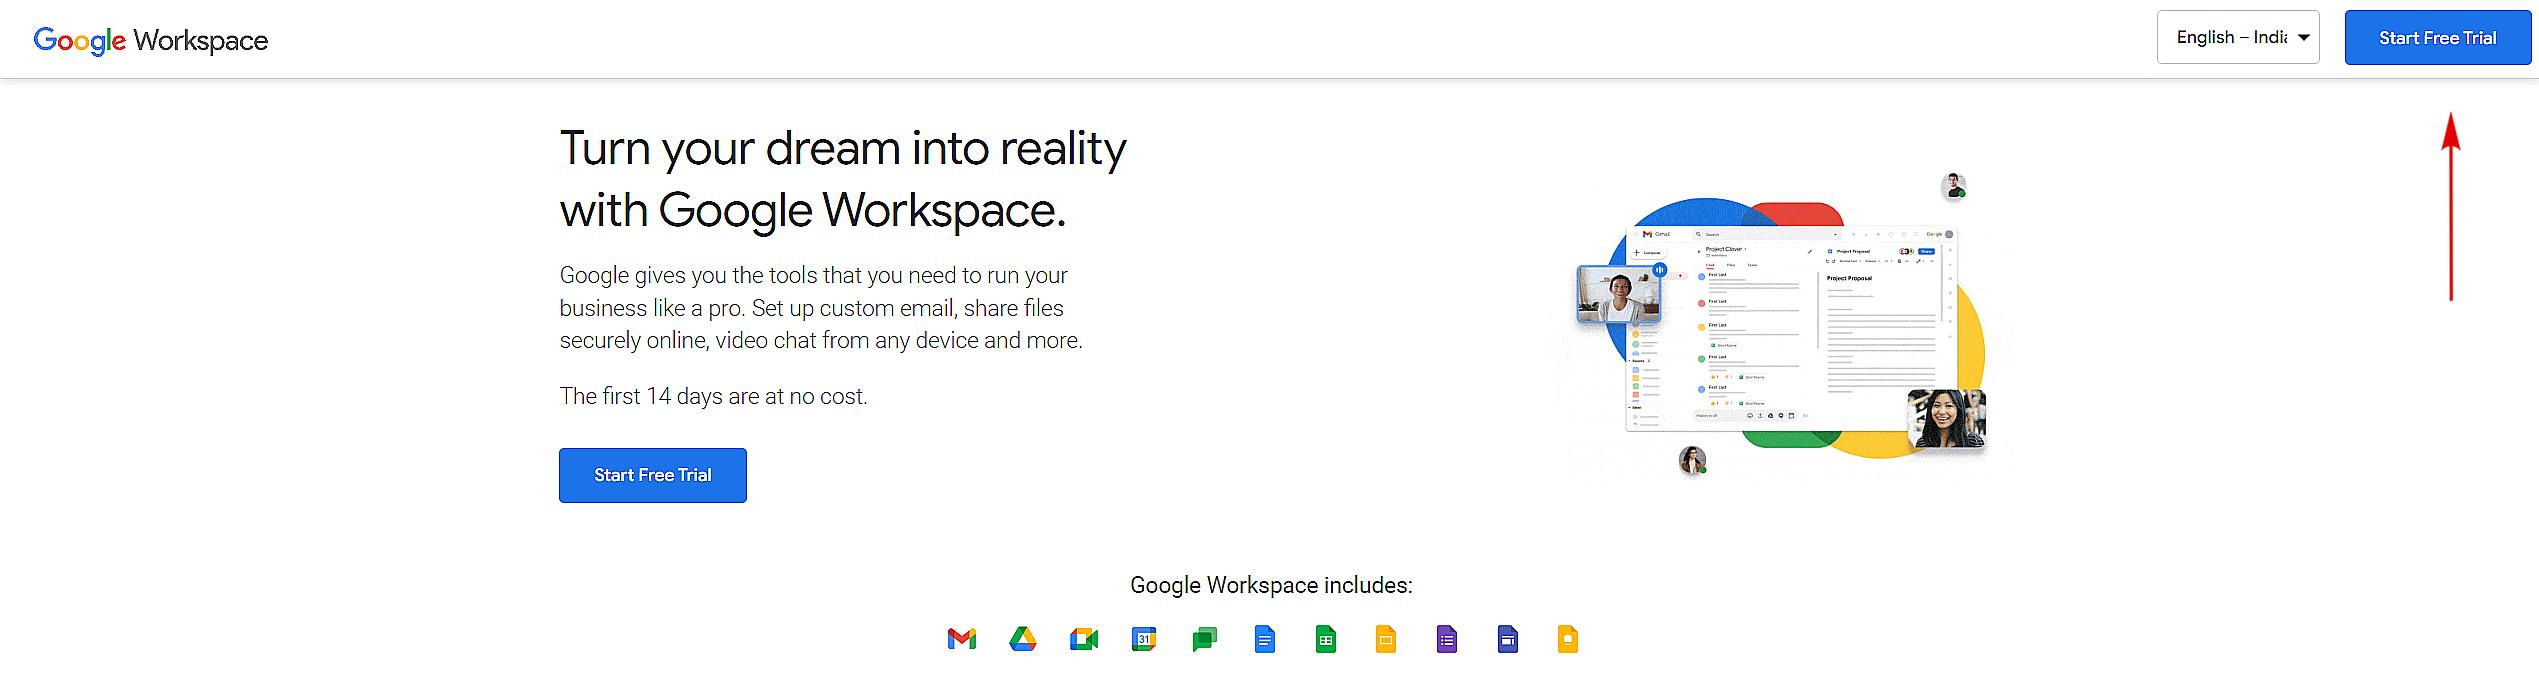
Go to the Google Workspace website and click on the “Get Started” button. Moreover, you can start a free 14-day trial.
2. Select Pricing Plan
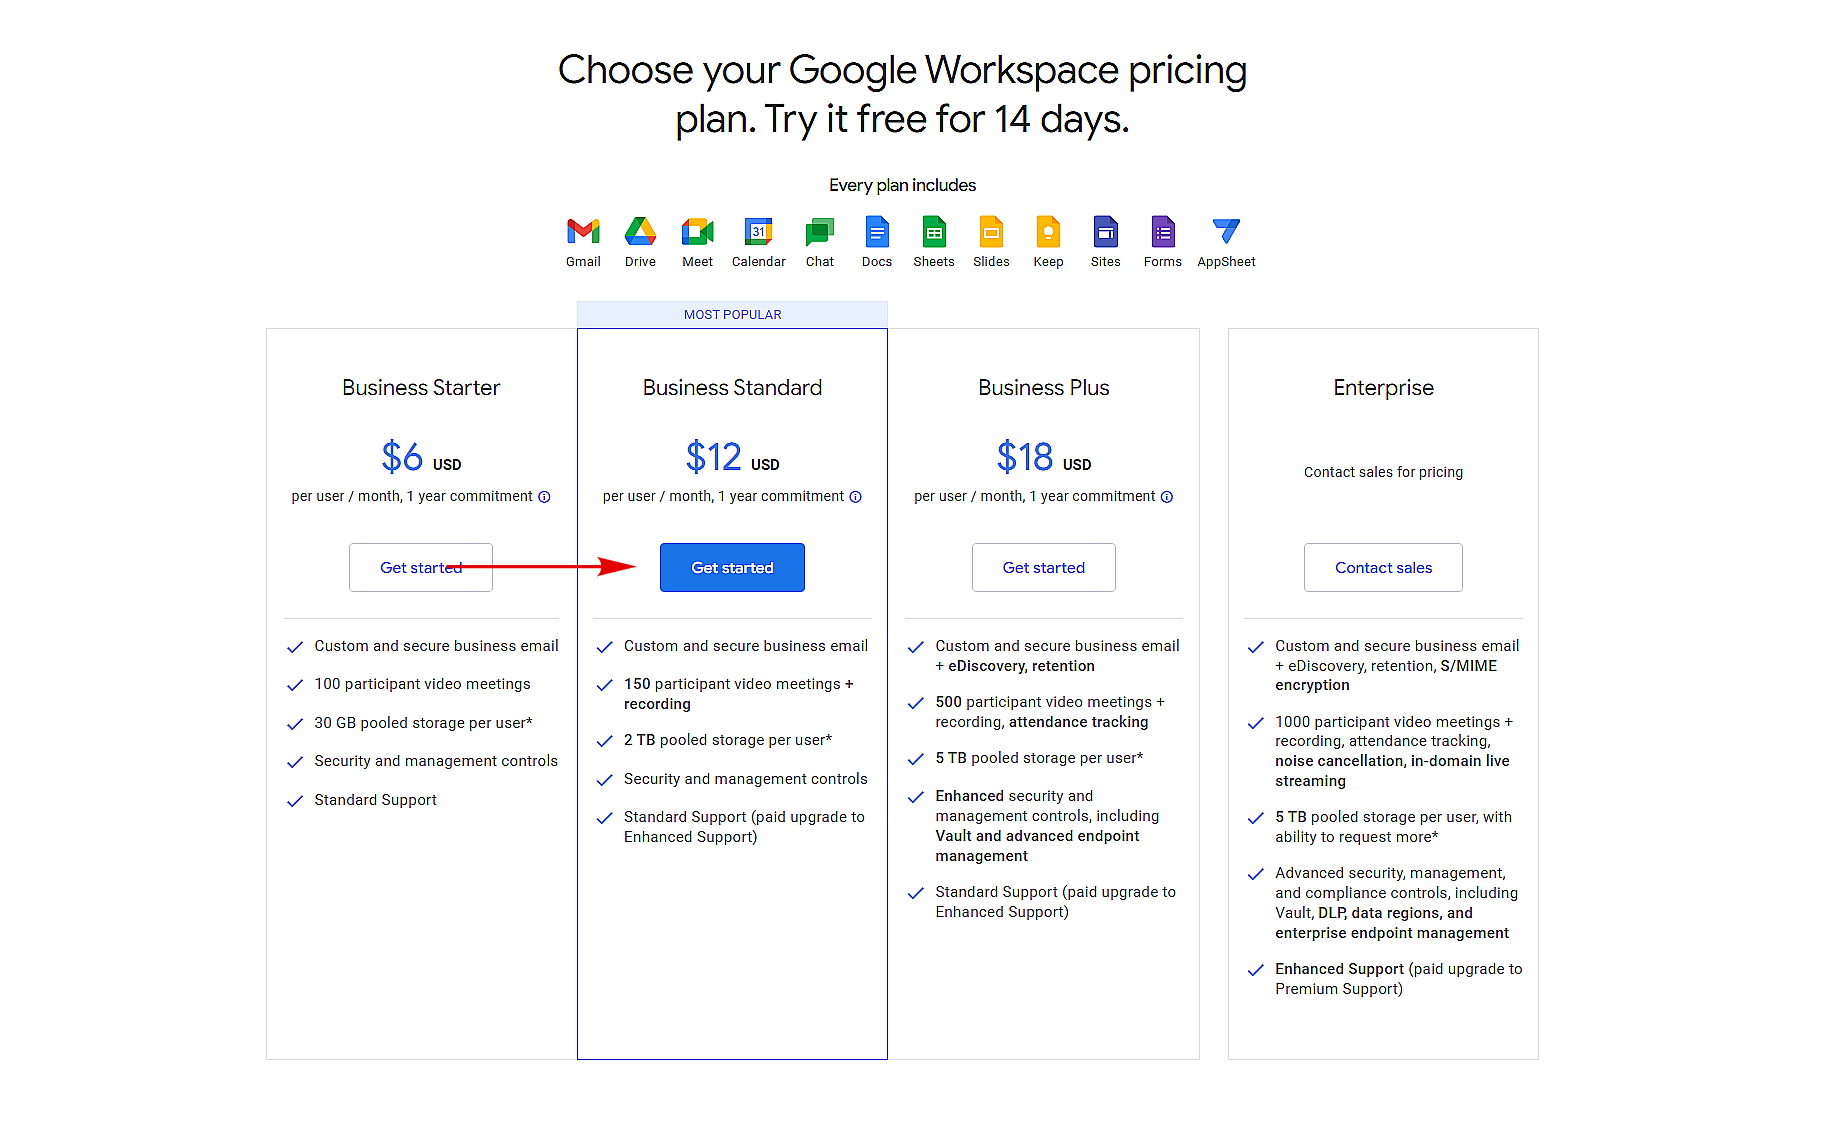
There are three plans available to choose from (Starter, Standard, and Plus). Select the plan that best fits your business, we recommend choosing Business Standard for medium-sized businesses. It comes with 2 TB of Gmail/Drive storage for each user.
3. Enter Basic Details

On the “Let’s get started” page, start putting your business name, and number of employees (including you) along with your country. For example, If you need 5 email addresses for your team select the number of employees 2-9 option along with the name and region of your business. This step helps Google Workspace to understand your business better.
4. Enter Admin Details
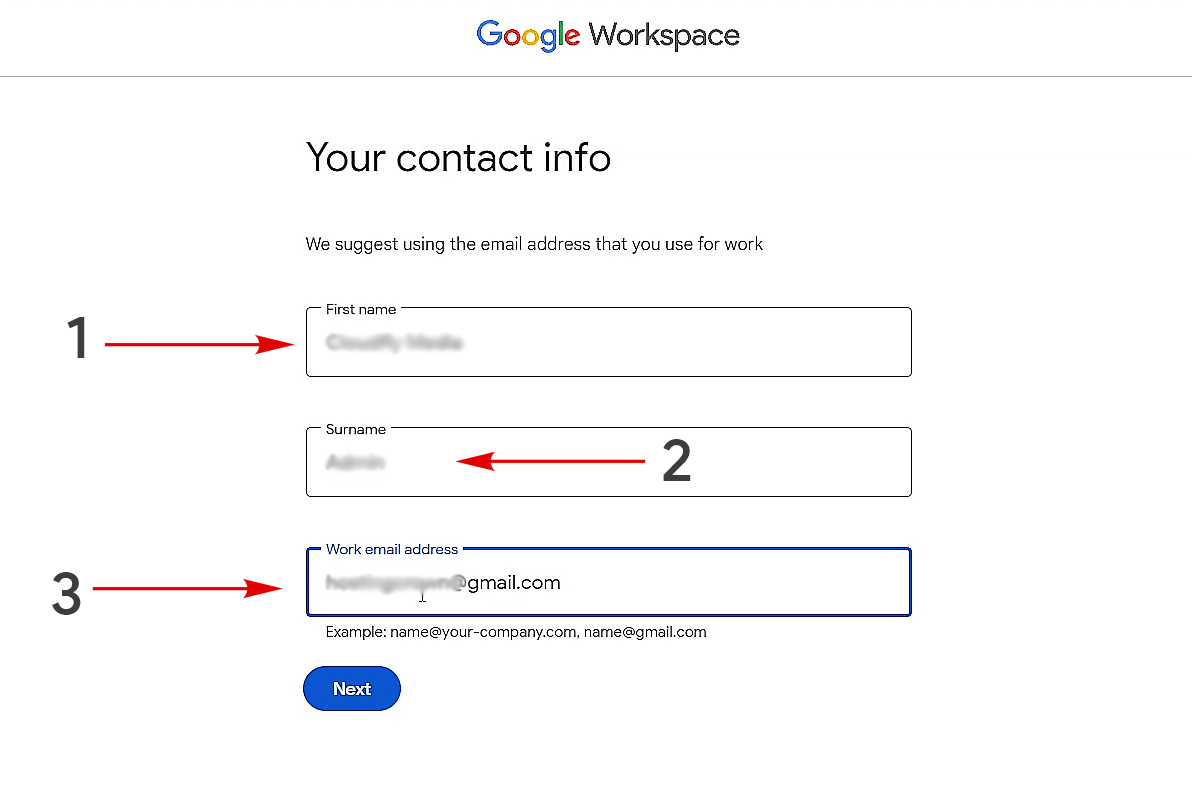
Furthermore, on the “What’s your contact info?” page, just fill in the details of the Google Workspace administrator such as first and last name along with the current working email address. The current working email may or may not be a professional email. It will automatically be assigned as an Admin Account for your business.
5. If You Have a Domain
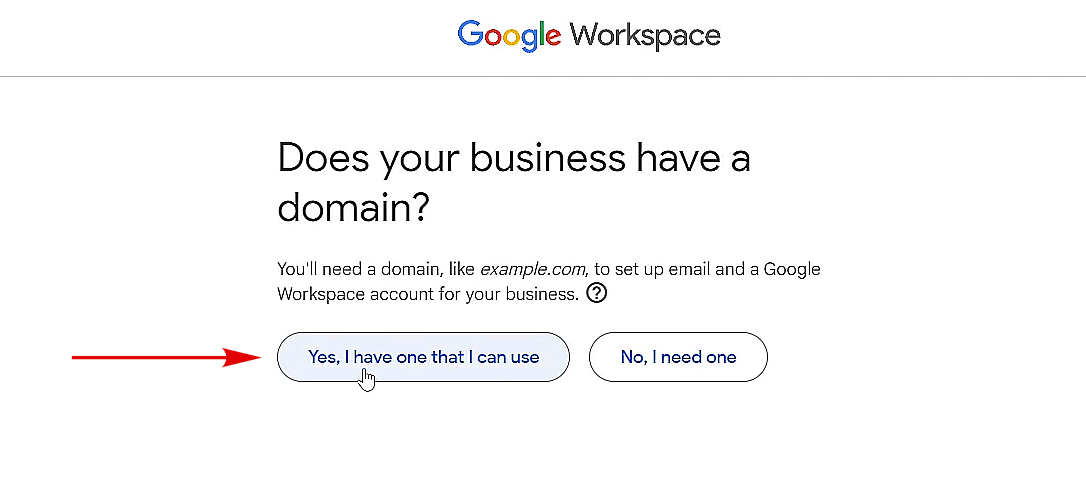
Assuming, you already have your business domain name (example.com) ready, when prompted with the question “Does your business have a domain?“, select the option “Yes, I have one that I can use“.
6. Enter Domain Name
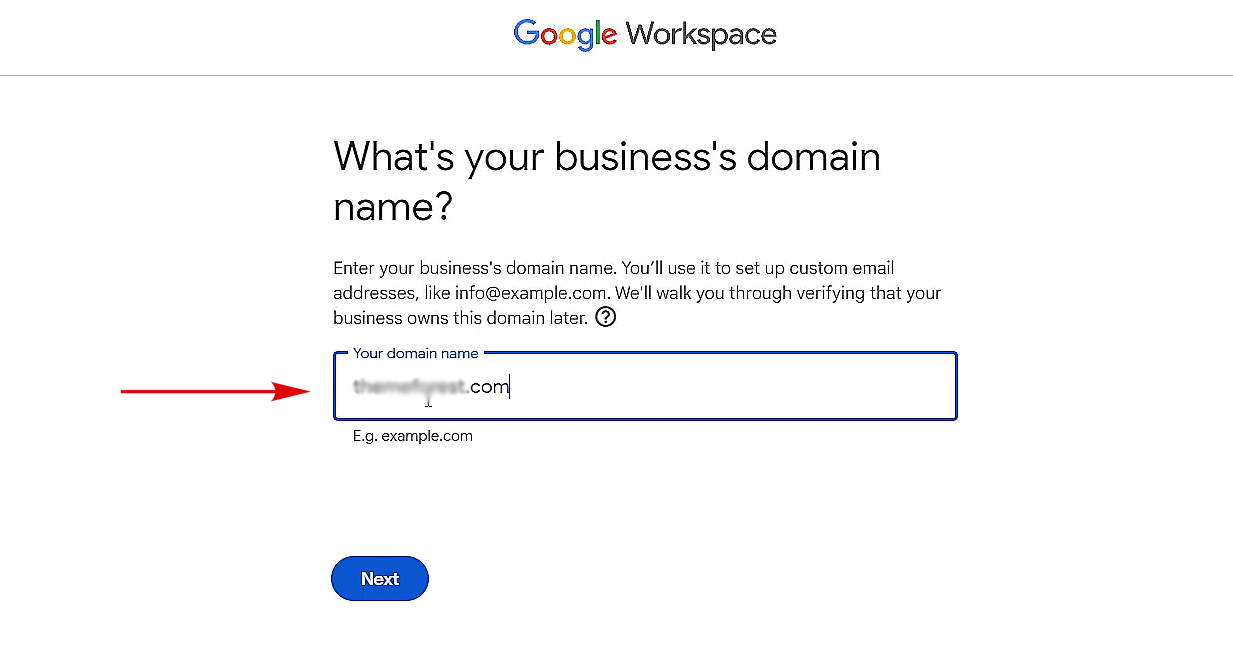
Enter your business domain name when asked for “What’s your business’s domain name?” and click next to proceed further. This step helps you to create professional email addresses for your business later.
7. Confirm Your Domain
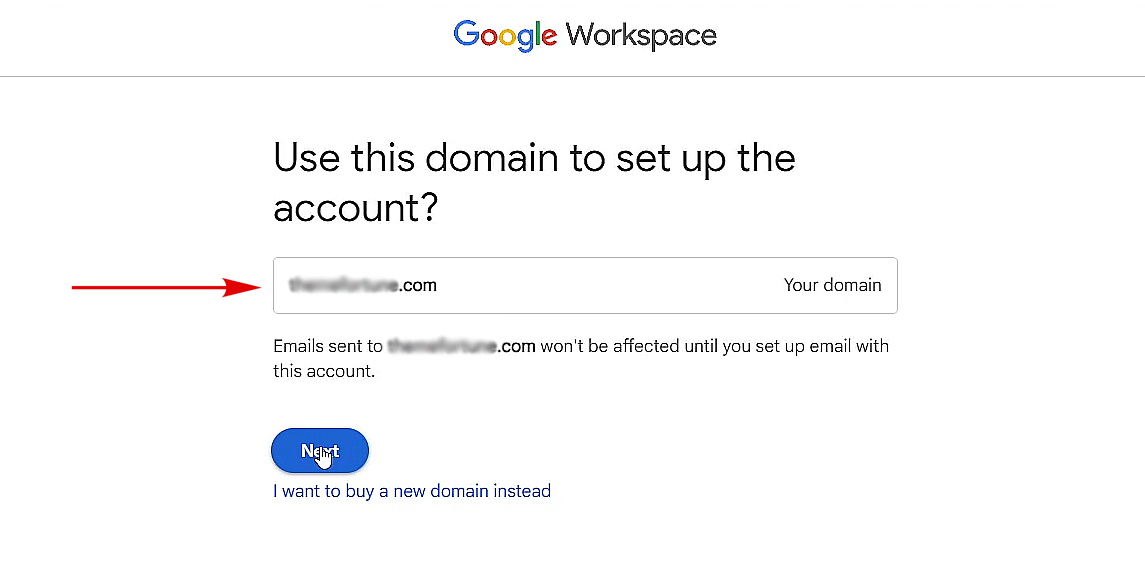
After you enter the domain, you will get a confirmation message i.e. “Emails sent to (example.com) won’t be affected until you set up email with this account“.
8. Create Admin User and Password
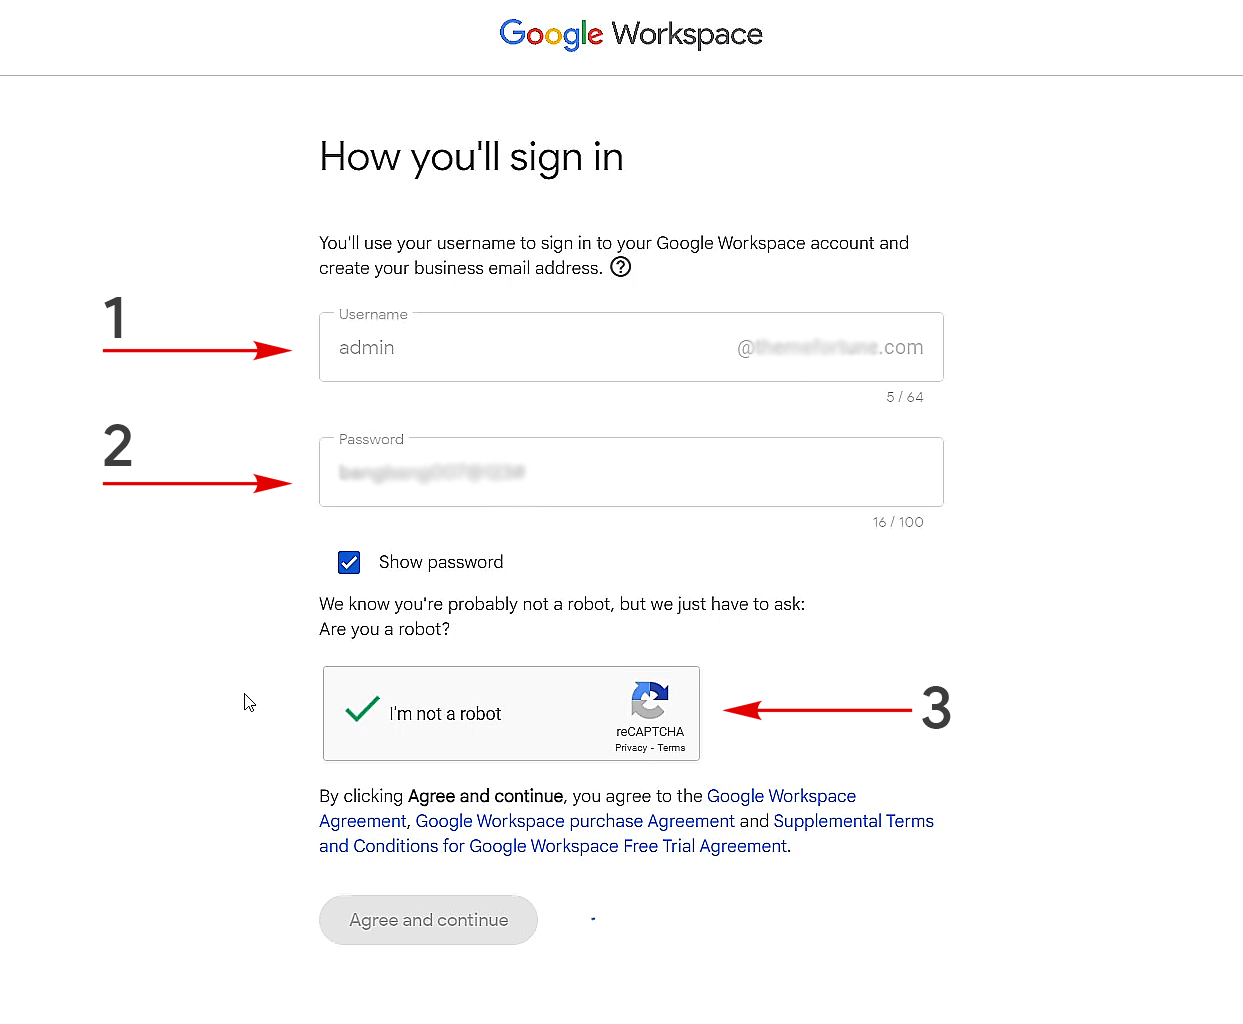
Finally, on the “How you’ll sign in” page, you need to create your first professional Admin email address (your main admin email) and password. Using these credentials you can access your Admin dashboard, anytime. You can choose any email and password combination of your choice. When done, click the “Agree and Continue” button.
As soon as you click the button, you will be redirected to the sign-in page.
9. Sign In to Your Workspace Account’s Admin Console

On the next page, log in to your Google Worskapce Admin Console using the same email address and password you have just created. Click “Next“.
10. Verify Your Phone Number
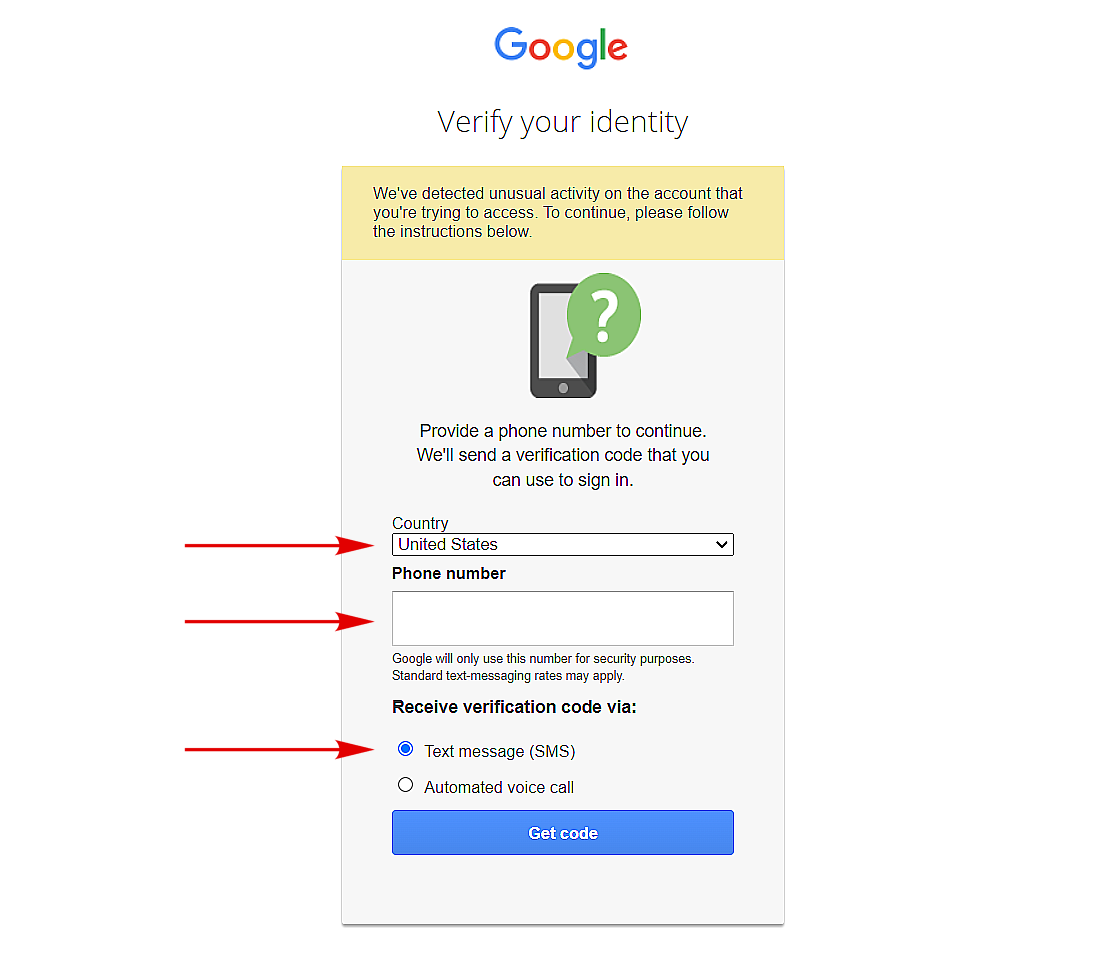
Now, all new Google Workspace Admins need to verify their phone number, just like you sign up for a free Gmail account. Simply select your country, enter your phone number, and choose text message to receive an OTP. Verify the OTP on the next page.
11. Accept Google’s Terms and Privacy Policy
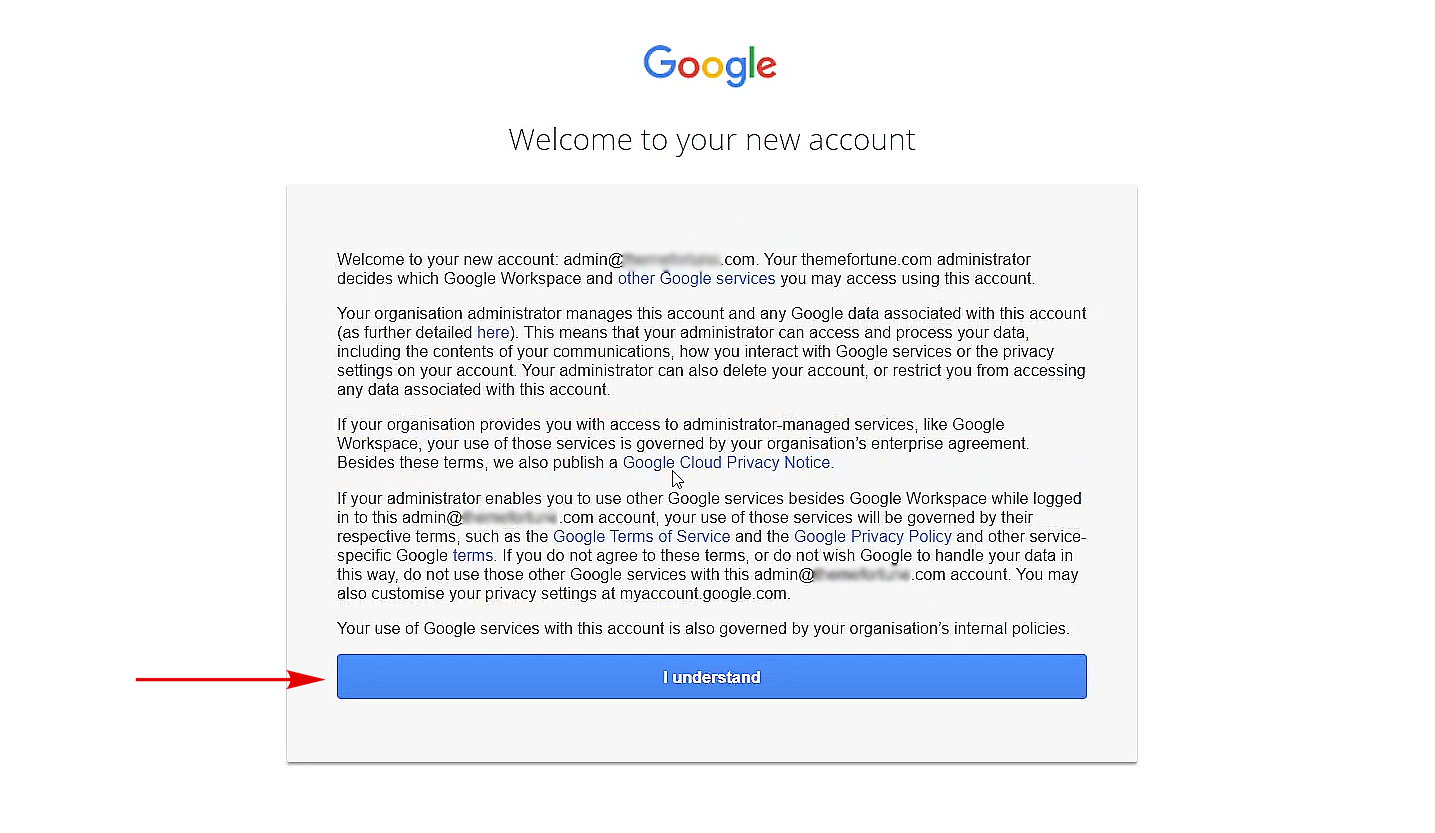
After the identity verification, you need to accept all the terms of service and privacy policies by clicking the “I understand” button.
12. Get a Discount Offer
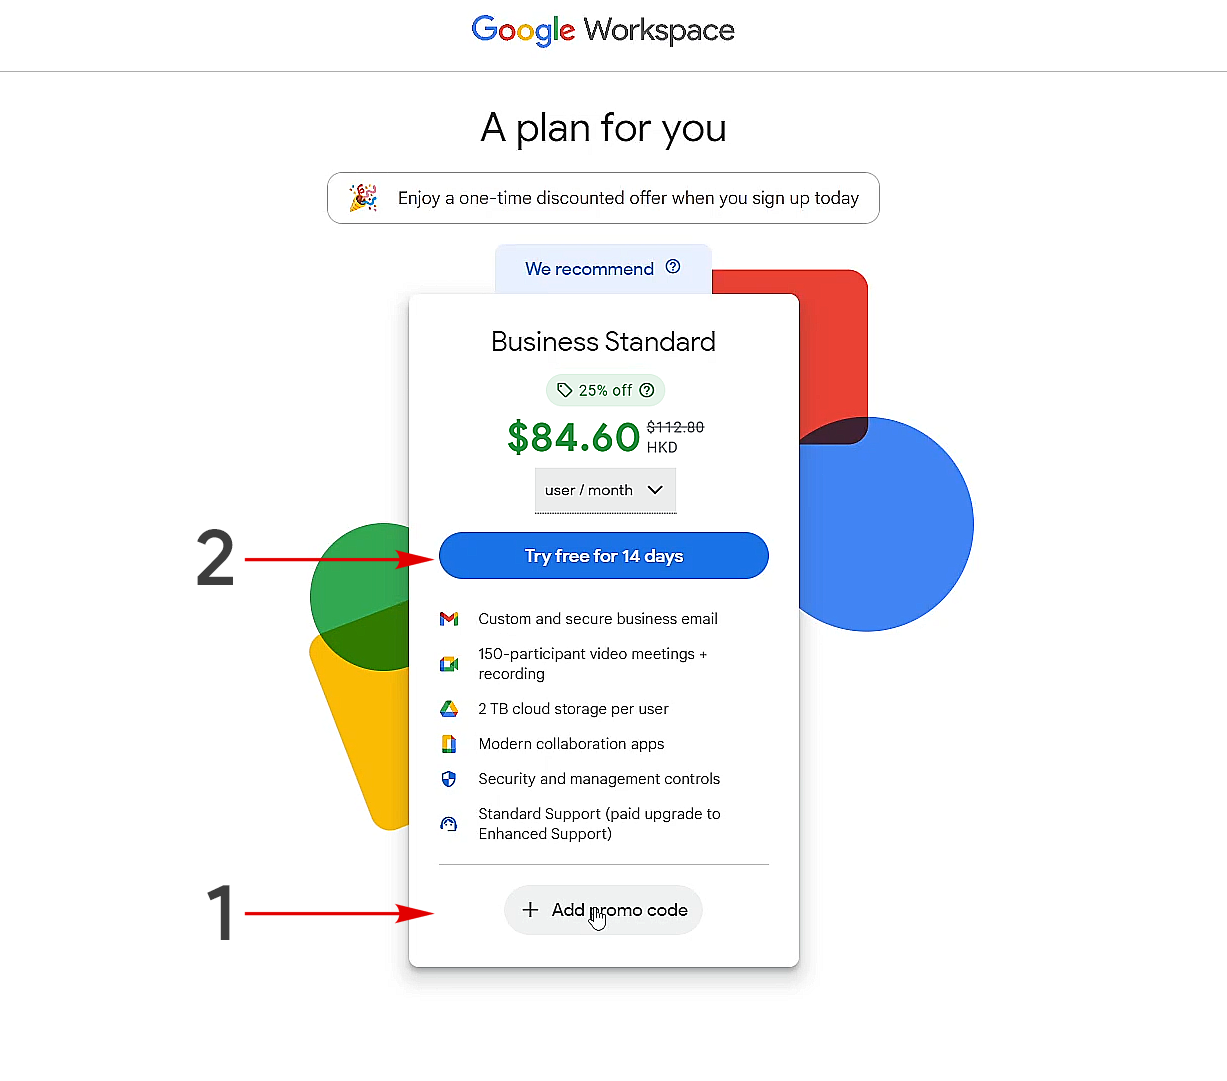
As a newcomer, you might encounter the “A Plan for You” screen. This offers a 10 to 25% discount, varying by country, typically favoring those outside the US. The discount is often applicable to Business Standard or Plus plans.
Unfortunately, there’s no option to bypass this page, leading to a situation where users feel compelled to switch from the Business Starter to the Business Standard/Plus plan. Importantly, there is a 14-day trial period during which you won’t incur any charges.
So, as of now, just click the + “Add promo code” button and get a unique Google Workspace Promo code from this link. Paste the promo code you receive in the “Add promo code” section and you are good to go. The promo code will get you an additional 10% discount per user per month for the first 12 months.
After applying the code, click the “Try free for 14 days” button and proceed further.
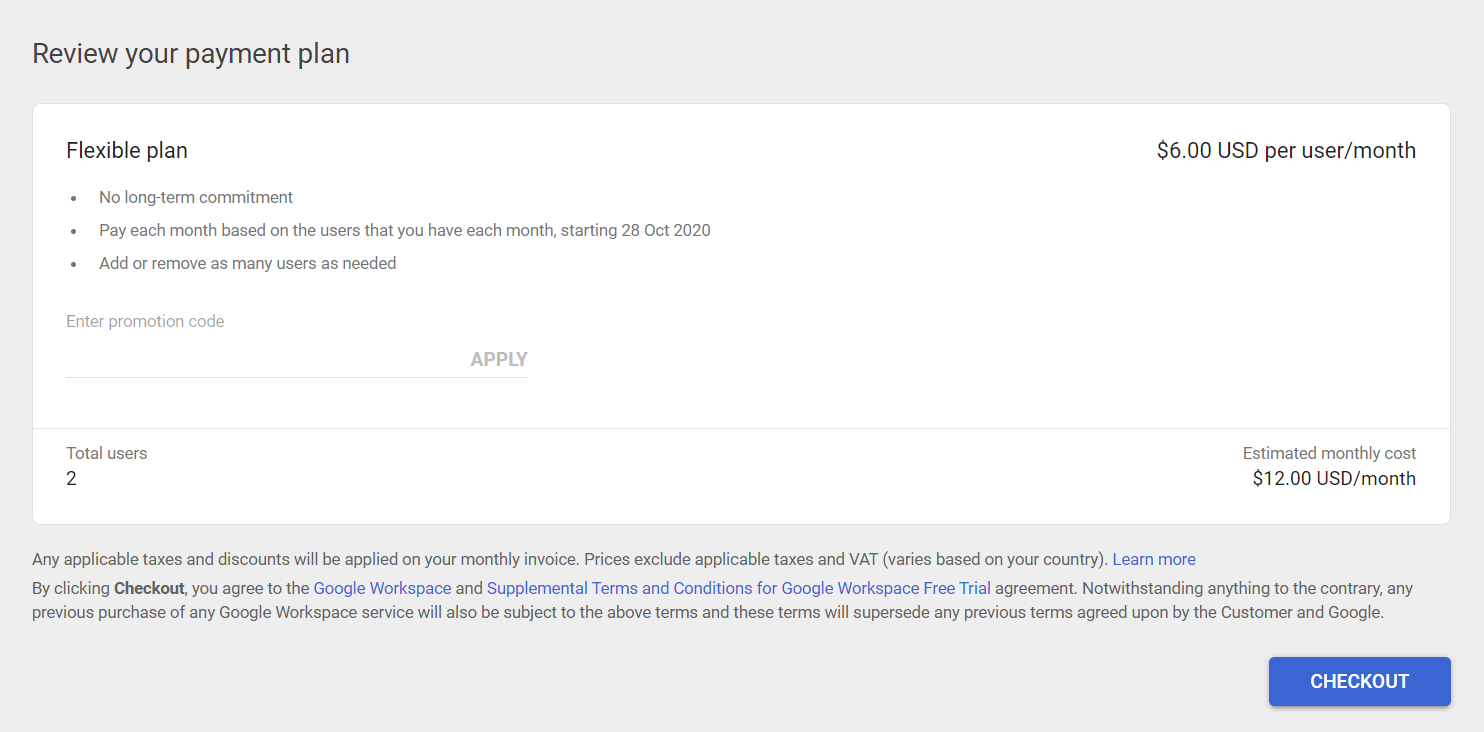
13. Fill Your Business Address
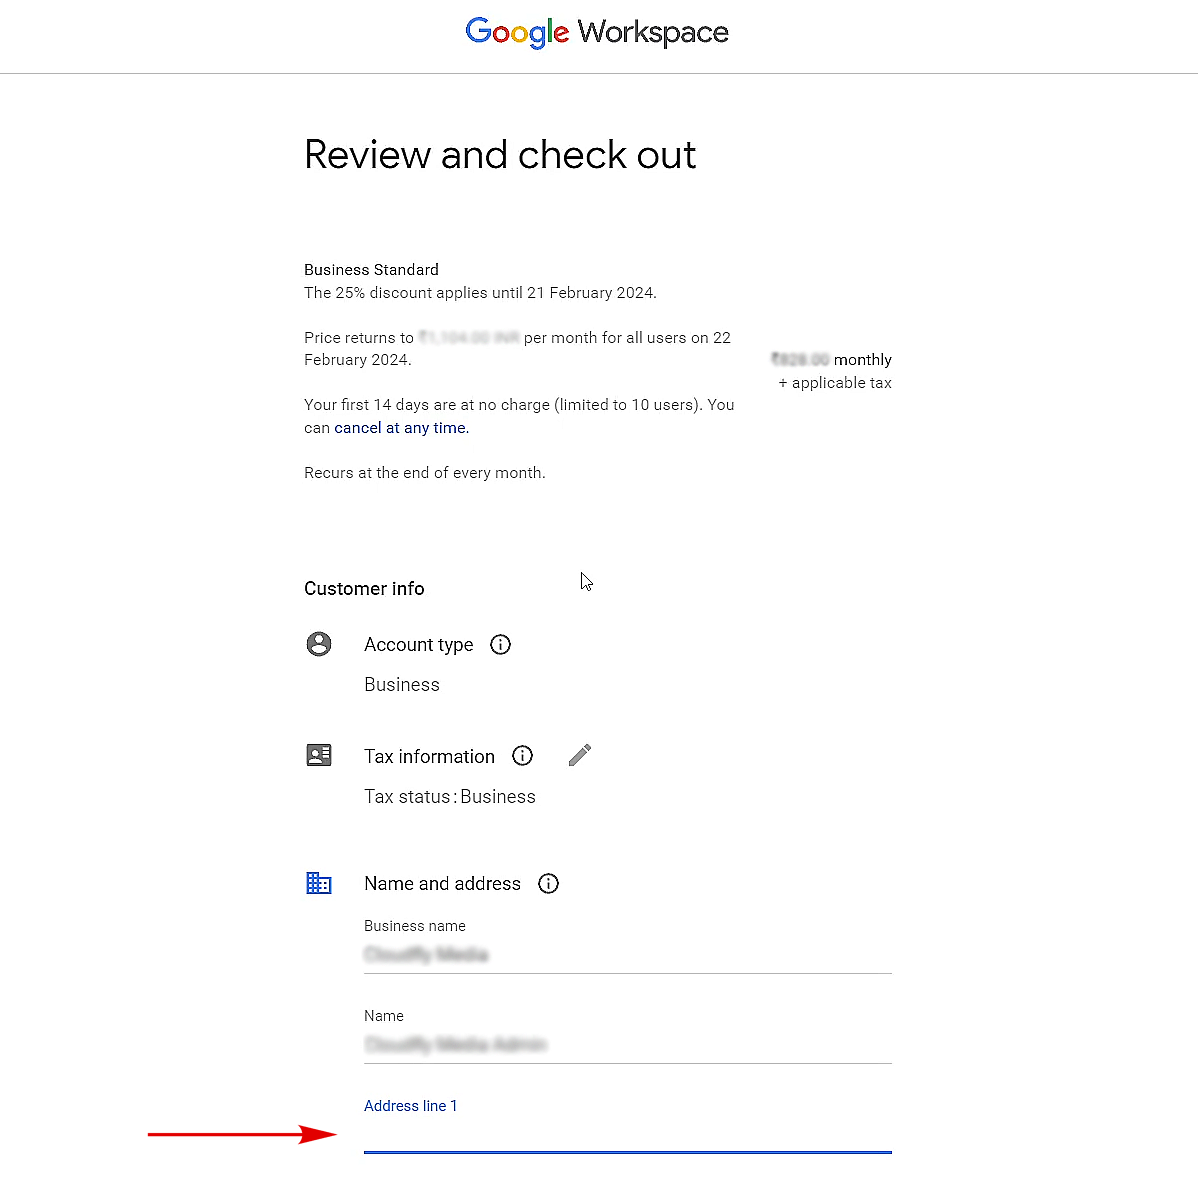
On the “Review and check out” page, you will get to see all your billing information on the top. Further, you need to fill in all the required customer info, such as your account type, tax information, and name and address of your business.
14. Fill Your Billing Details
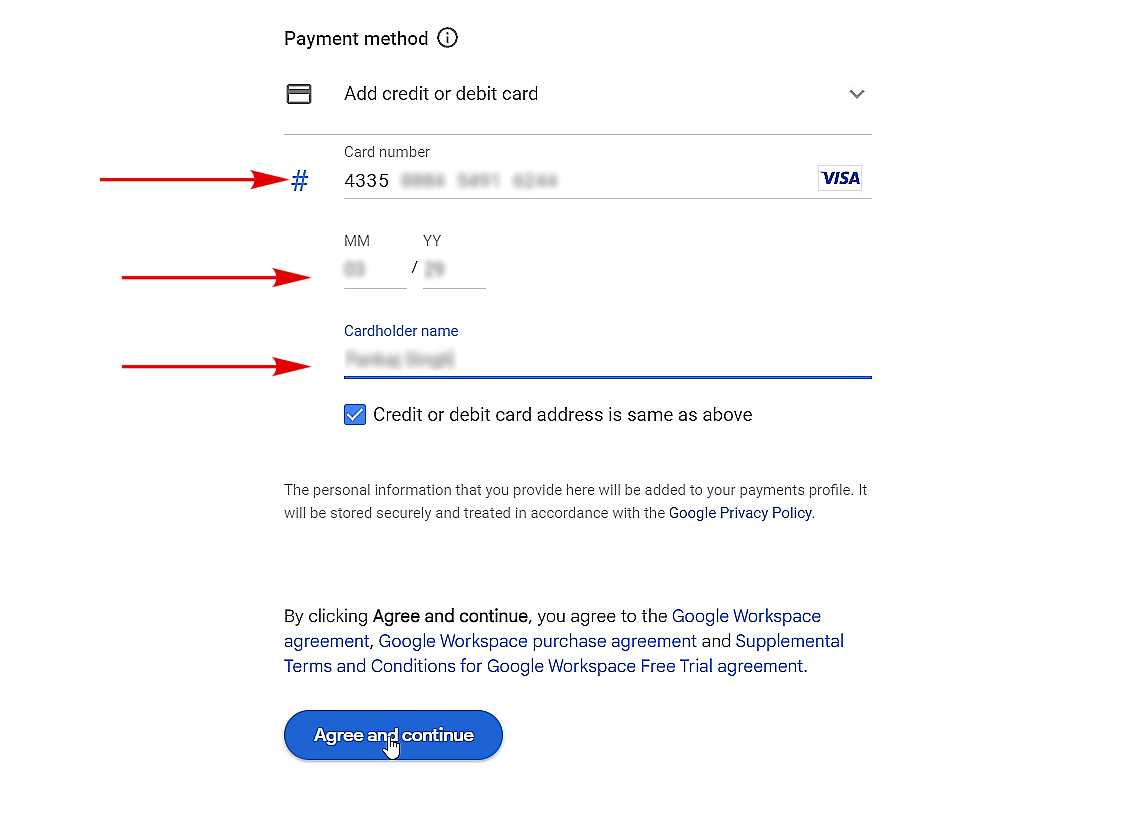
On the same page, scroll down to the bottom of the page select your preferred payment method, and enter all the required billing details.
Click “Agree and continue” and you are done with the Google Workspace signup part.
Note: You won’t be charged for the first 14 days if you are on a trial offer.
15. Final, Admin Console Page
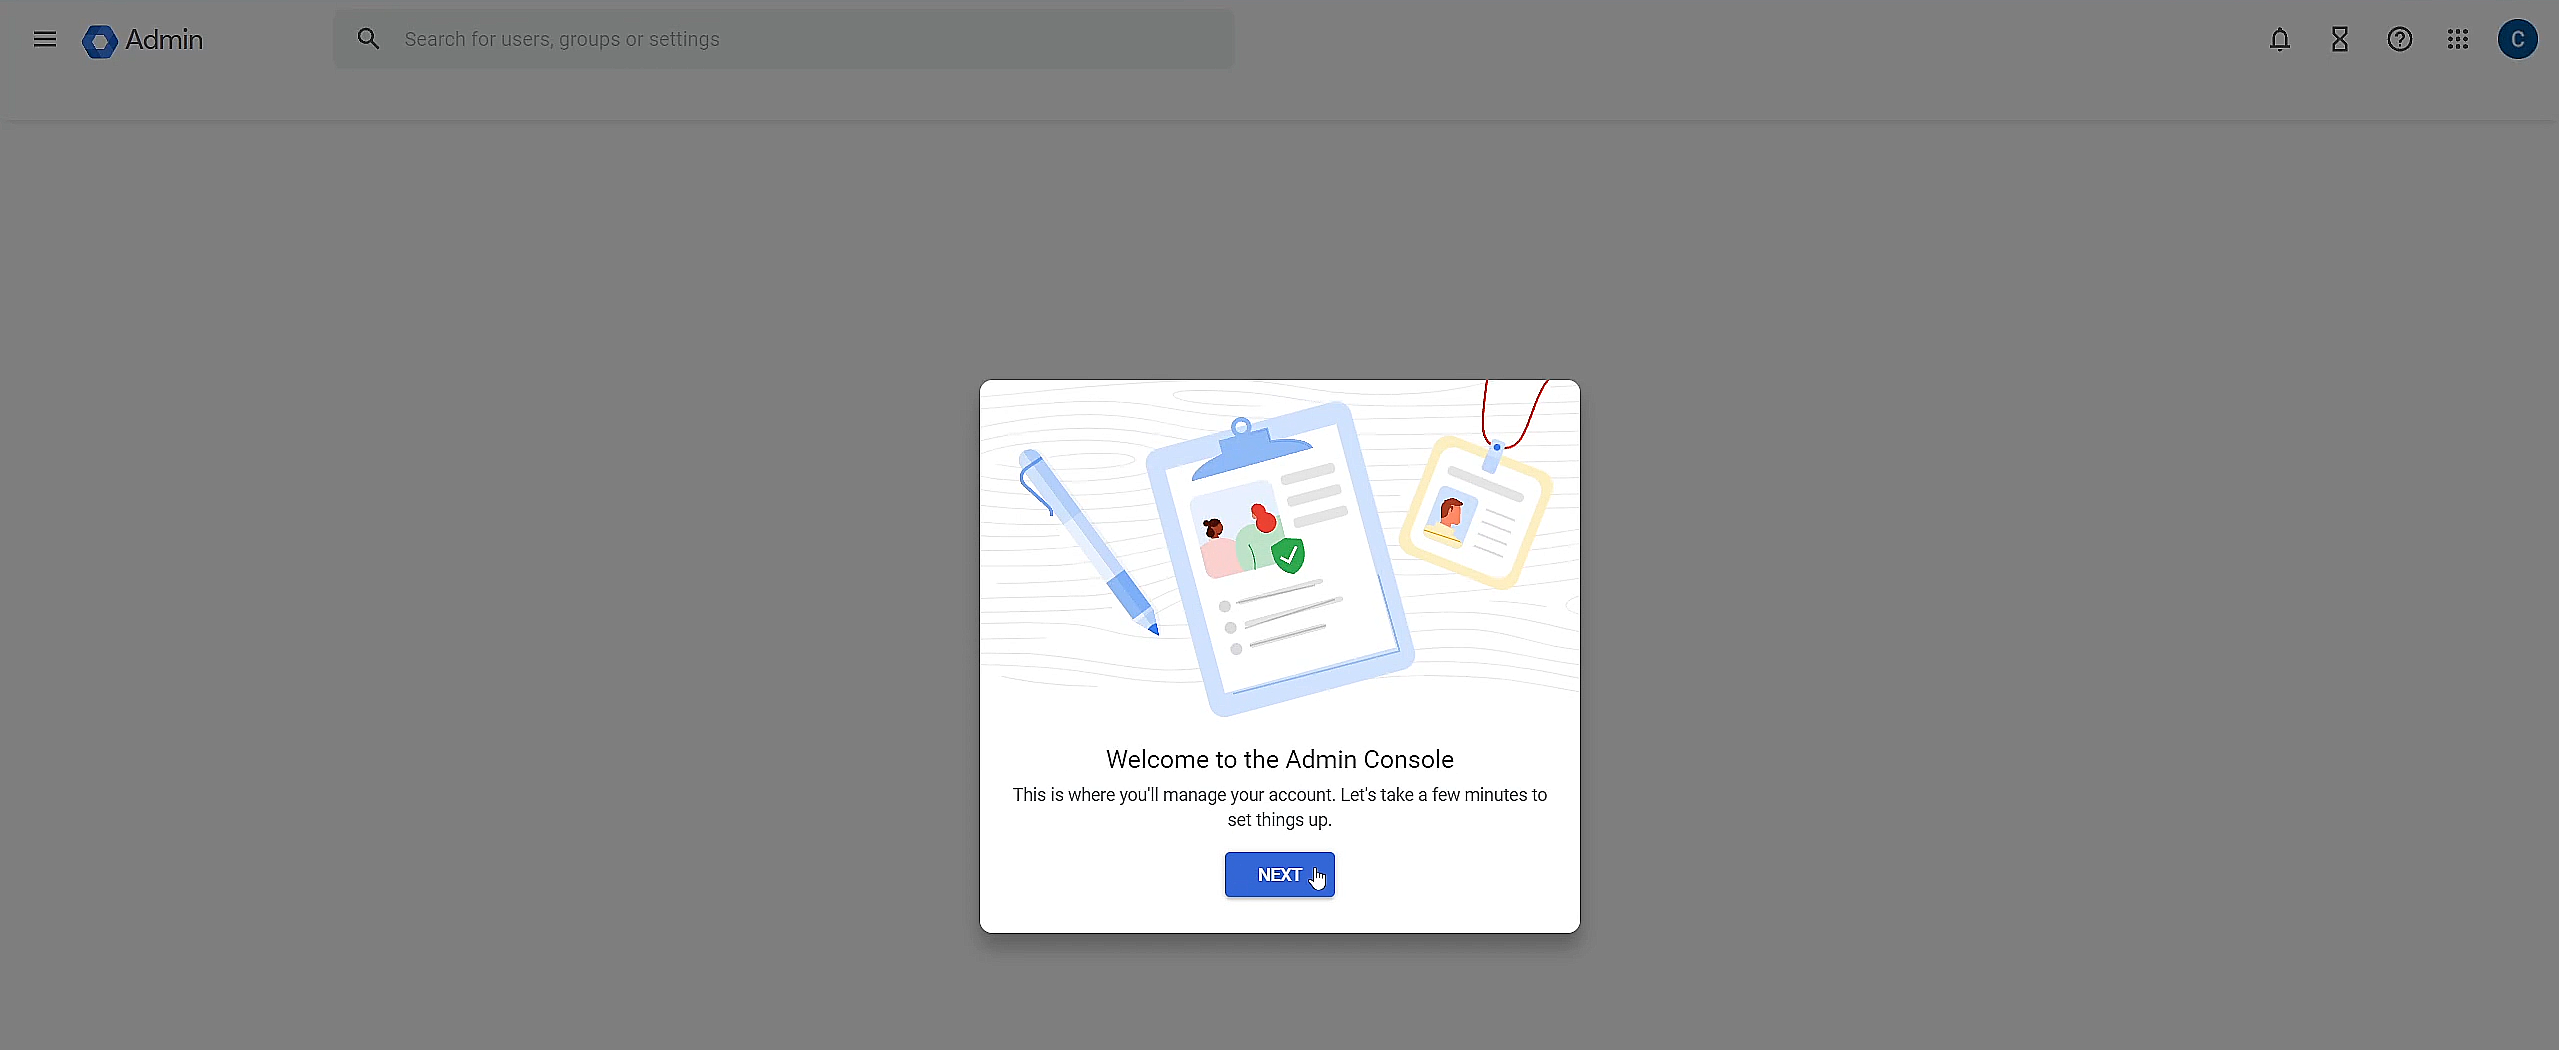
Finally, If you see the “Welcome to the Admin Console page“, you have successfully created a Google Workspace admin account. On the Admin Console page, you will see a popup that will help you set up your domain with Gmail nicely and easily. Click the Next button and continue to the next screen.
Now all you need to do is to set up Gmail with your domain name to start shooting business emails. The next part of this article will guide you on how to activate Gmail services in order to send and receive emails on the fly. Keep reading.
Setup Gmail Professional Service With Domain
Gmail is a core feature of Google Workspace which allows you to create and send professional emails. All other applications and services are structured around Gmail. Therefore, to fully utilize the capabilities of Google Workspace, activating Gmail is essential, as it unlocks access to the suite’s comprehensive range of features. That is why we need to activate Gmail.
16. Activate Gmail Automatically
(Set TXT and MX Records to Domain Name automatically)
Google Workspace can quickly activate Gmail services. It has the capability to identify your domain registrar automatically so that it can seamlessly add a TXT record to your domain name. It helps in safeguarding it from potential internal misuse. It also automatically adds MX records to your domain DNS for better performance and to serve industry-standard security.
Automatic setup hardly takes 5 minutes and after that, you are ready to use Gmail’s professional service. Here are the steps.
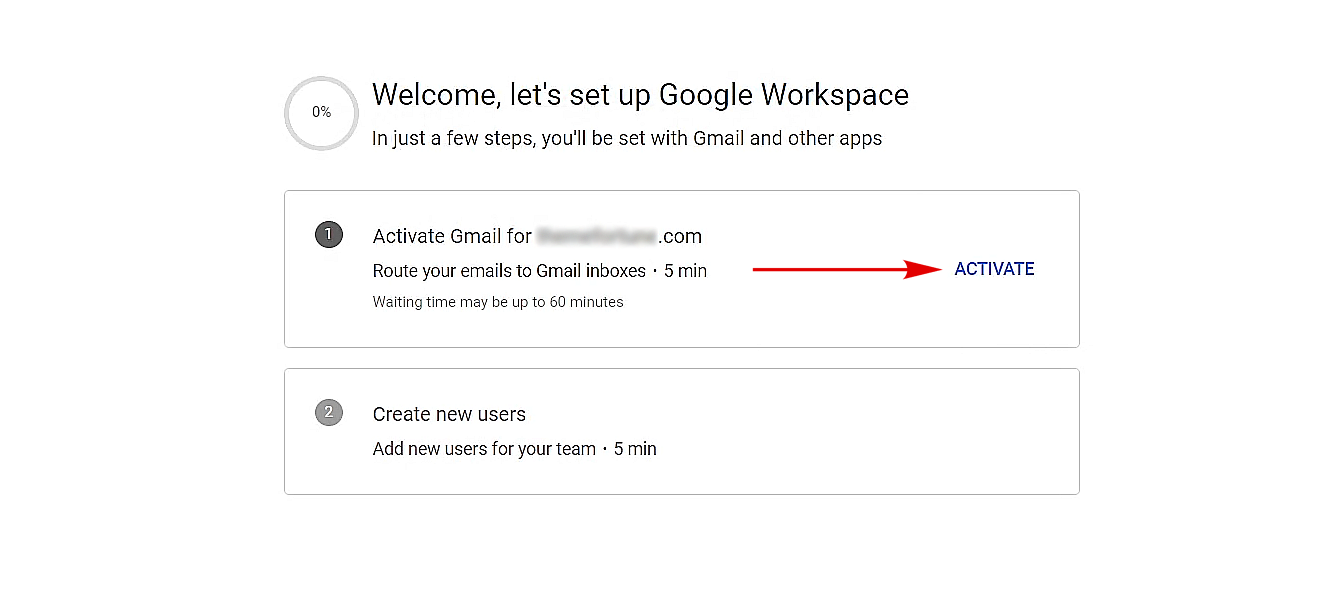
1. On the “Set up Google Workspace” page, click on the Activate button to start with the automatic activation method.
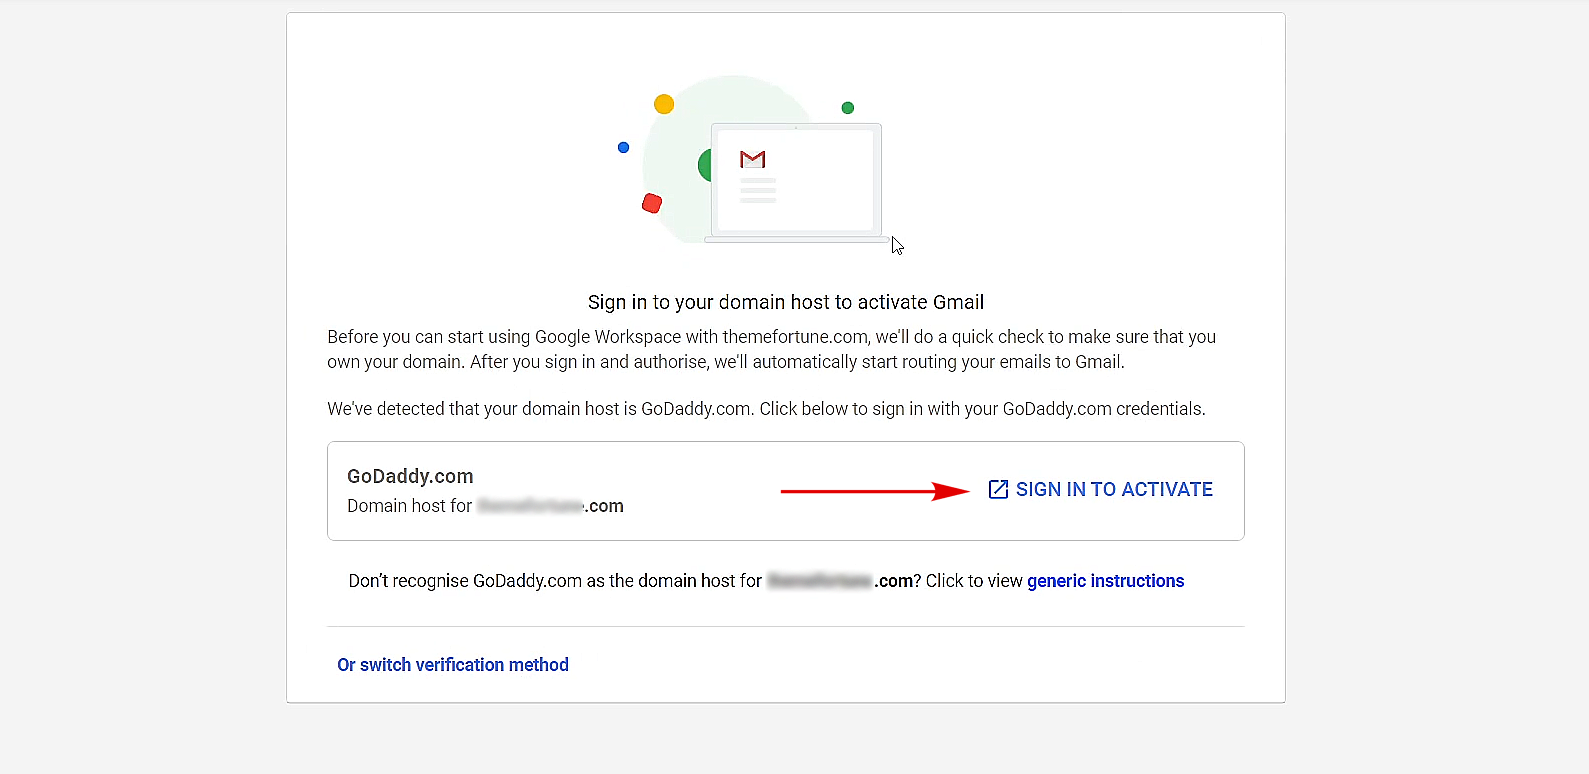
2. On the subsequent page, your domain registrar’s name will be displayed. If it is correctly identified, click on the “Sign in to activate” button.
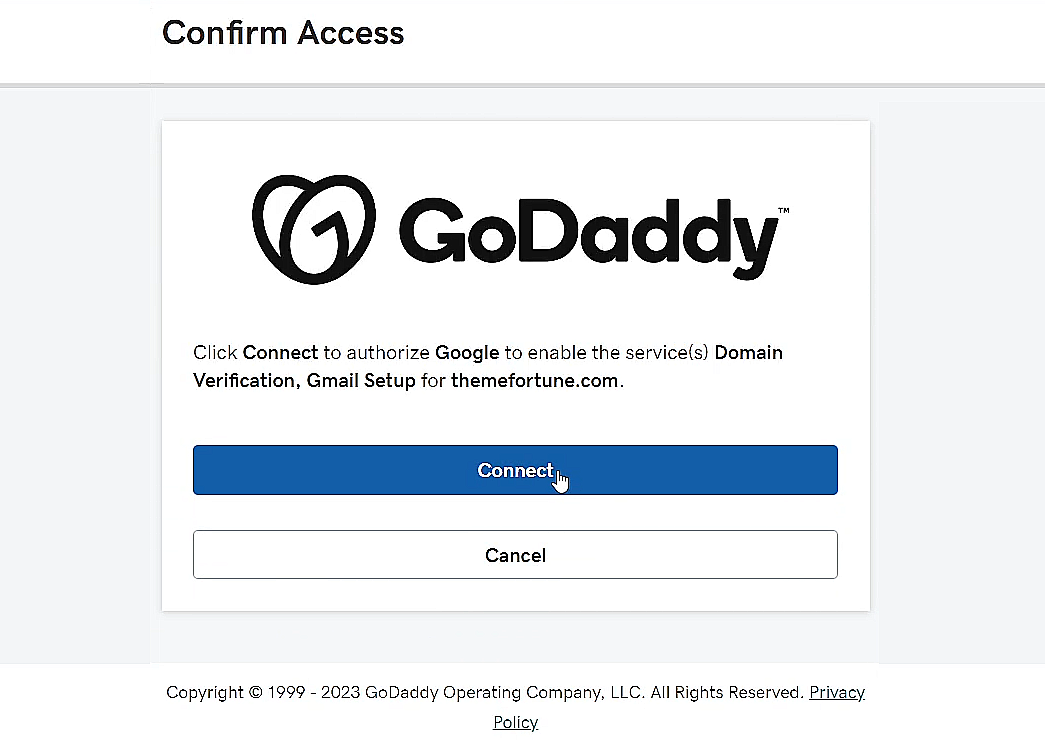
3. After clicking the Sign in to Activate button, you need to log in to your domain host via a popup window that appears on your screen. Also, you need to authorize Google to enable the DNS services. To do that, just click the Connect button as shown below.
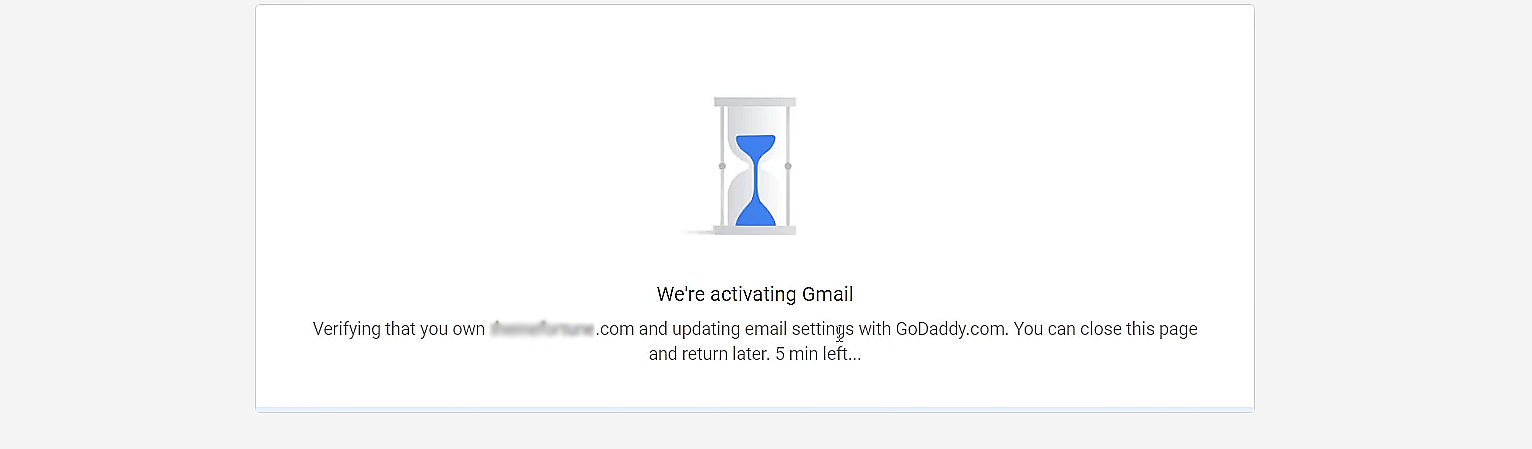
4. All done, Google Workspace will now automatically add the required TXT and MX records to your host domain. The process takes hardly 5 minutes to complete.
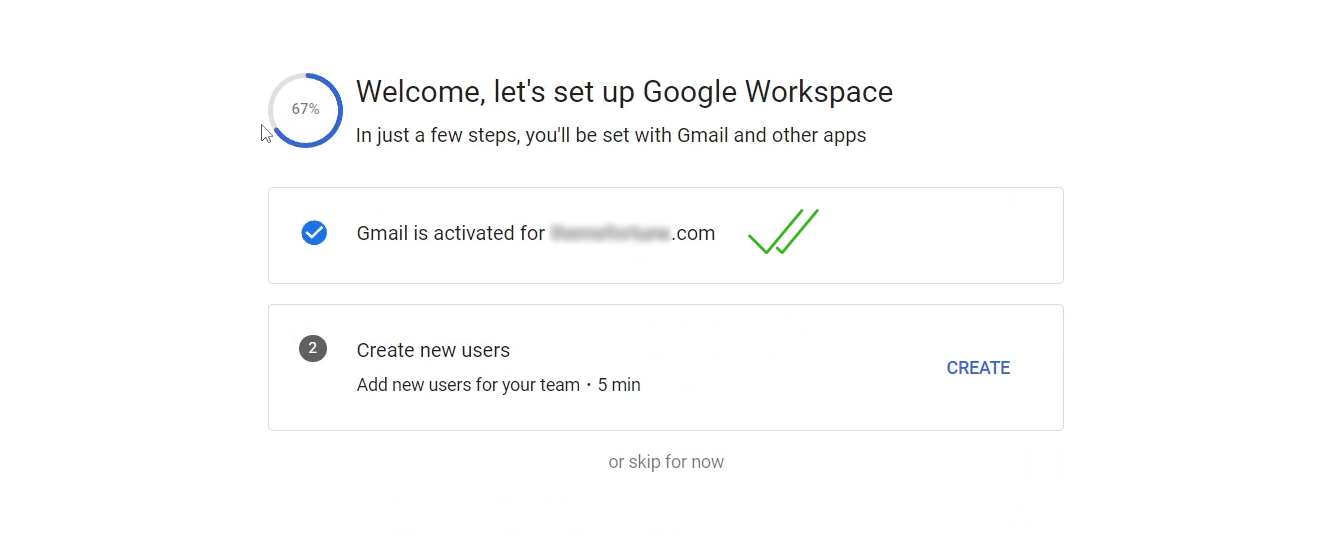
5. Wait for a couple of minutes, and thereafter check if you see a blue tick appear in the “Gmail is activated” box. If yes, then your Gmail account is now fully active and you can use all the services on the go.
Sending professional emails through Gmail is simplest with this configuration method. However, if you prefer to set up Gmail manually for any reason, we have provided a tutorial for that further below.
17. Activate Gmail Manually (Add TXT Record)
To protect your domain, you need to add a TXT record in your domain’s DNS. Here is how you can do it.
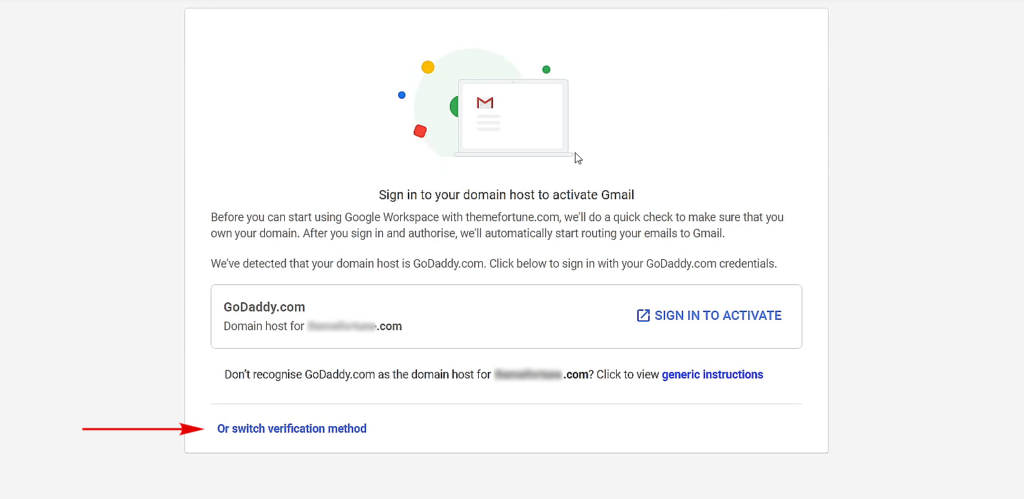
1. Click the switch verification method link as shown in the image below.
2. Click the Verify/Protect button (whichever shows up) as shown in the image below and follow the next screen.

3. On the following page, proceed by clicking “Continue,” as the TXT verification method is pre-selected by default.
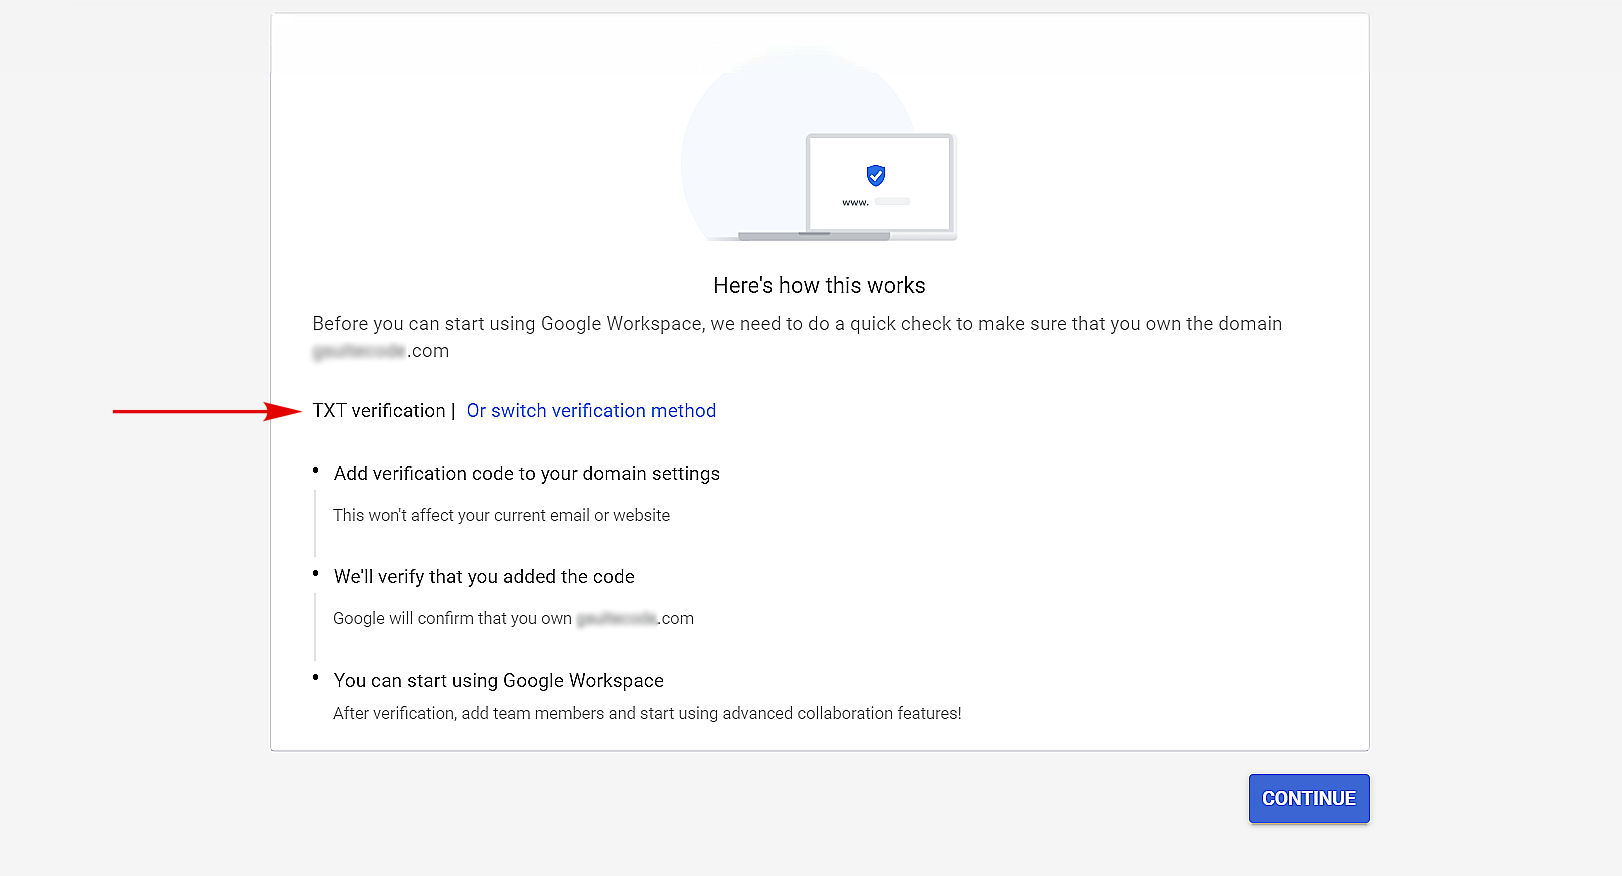
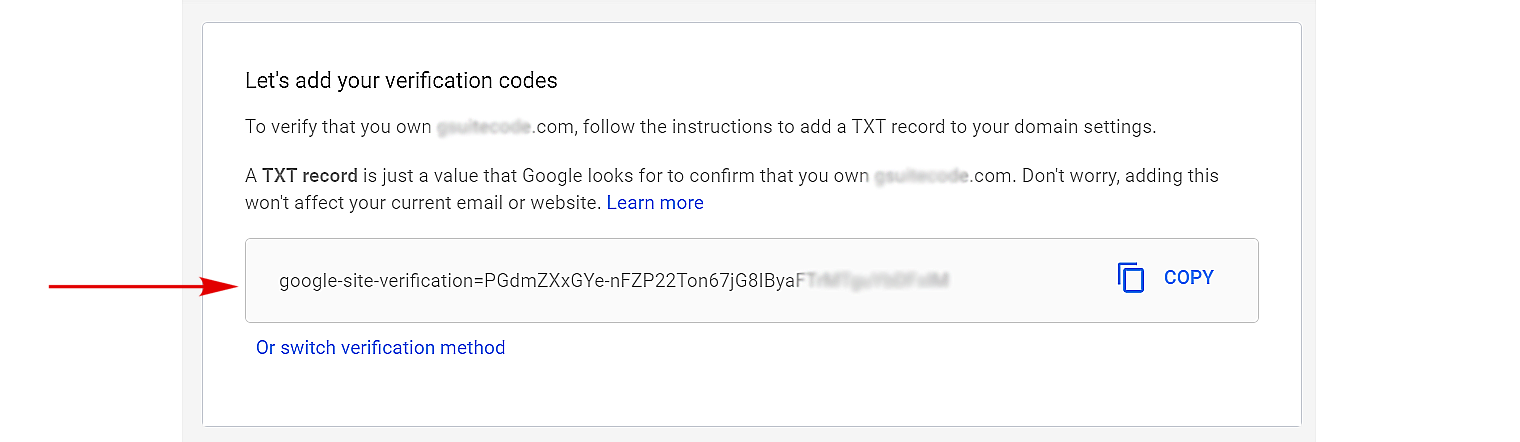
4. Copy your TXT verification code from the next page and visit GoDaddy (or any other domain registrar).
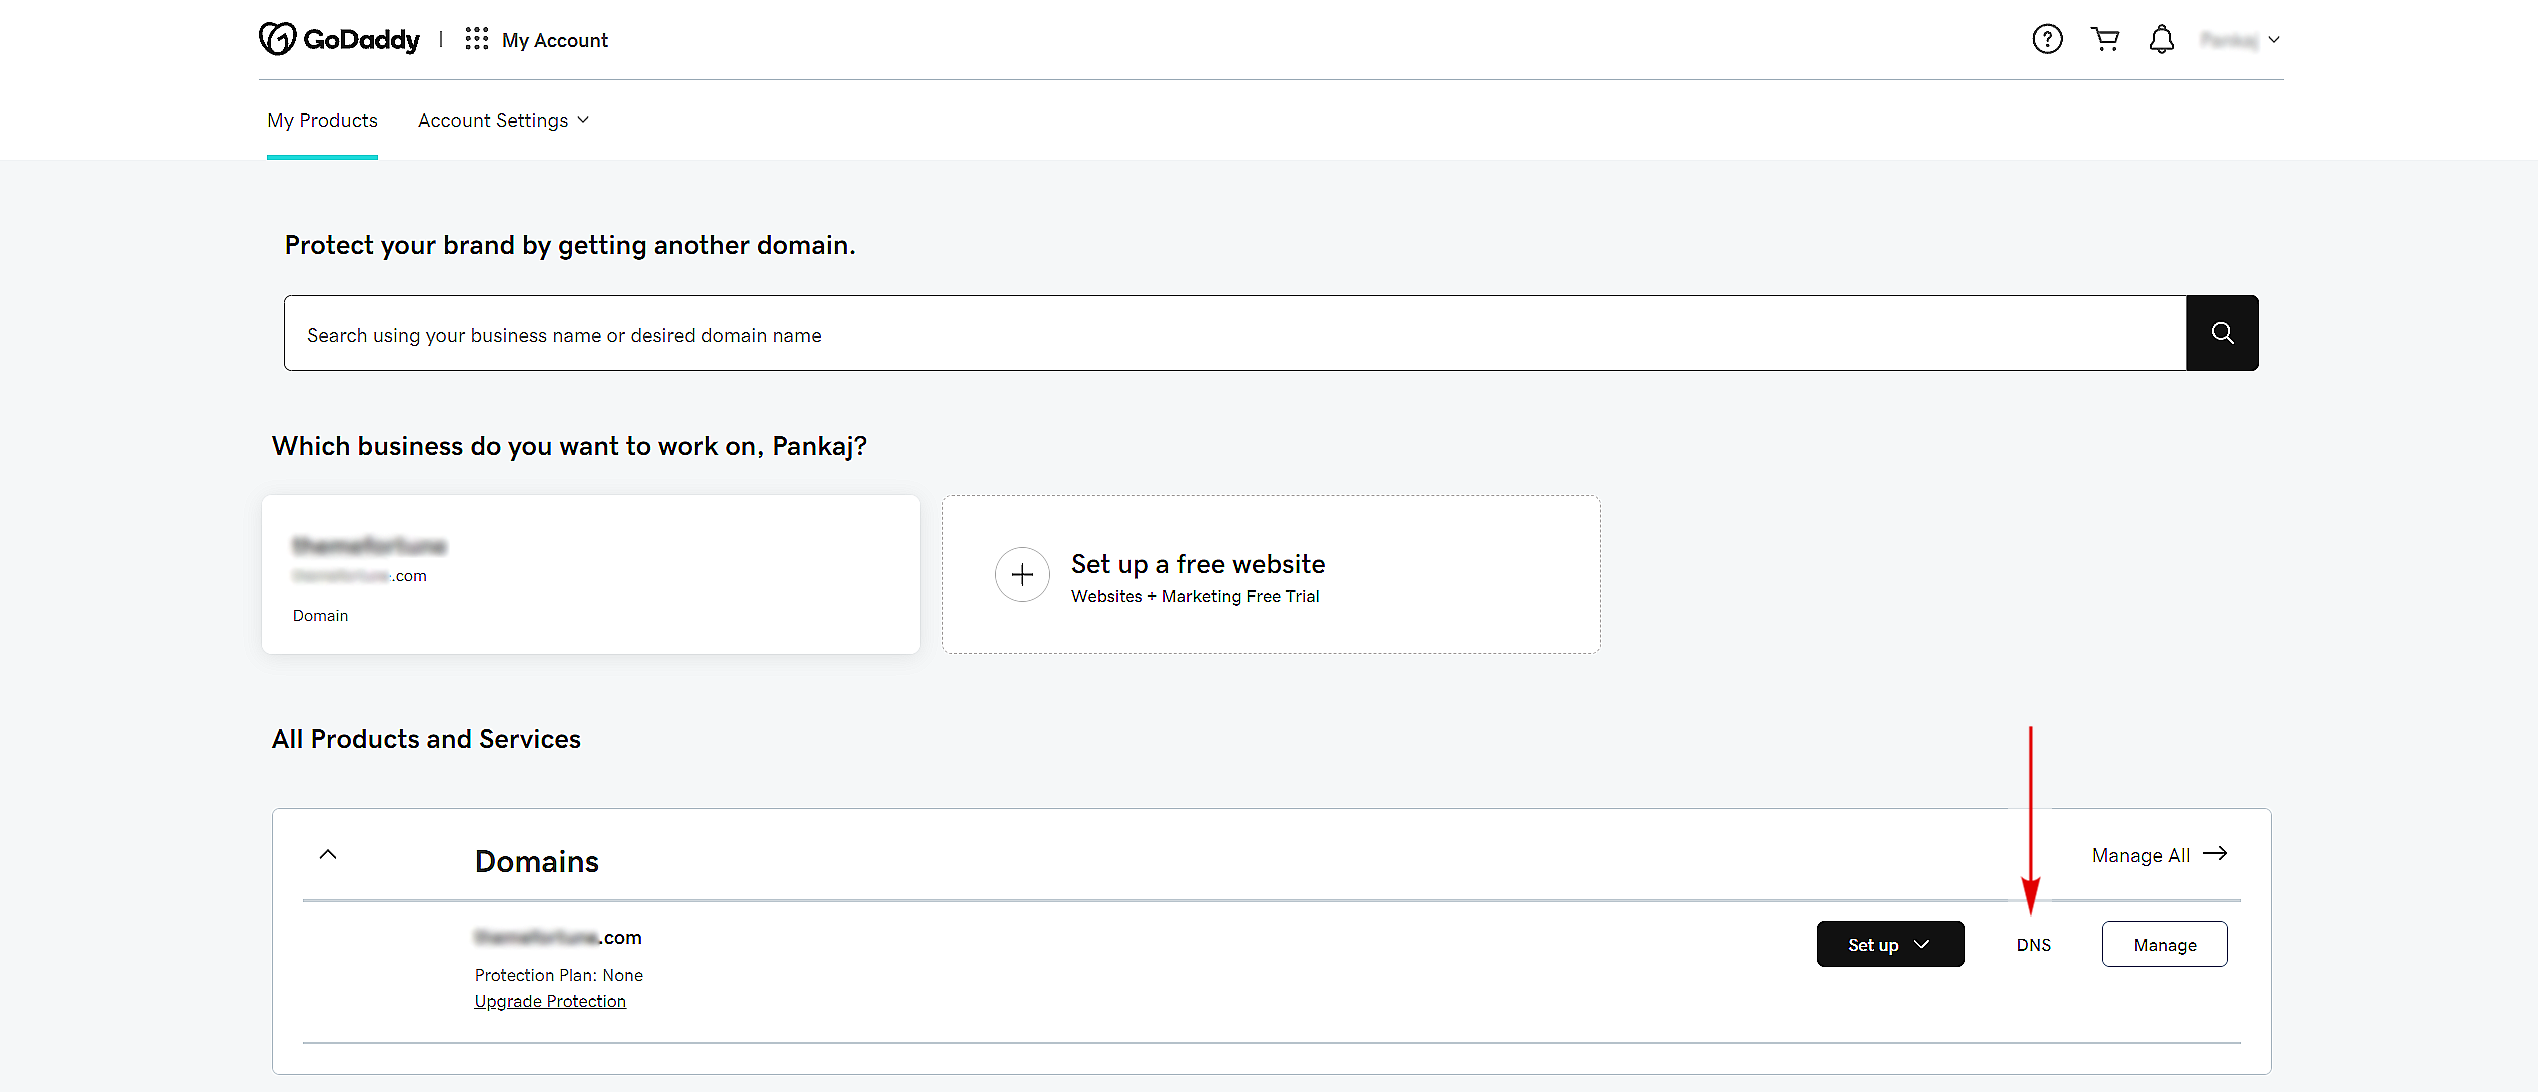
5. Now go to My Products – All Products and Services – Domains – DNS to go to DNS management.
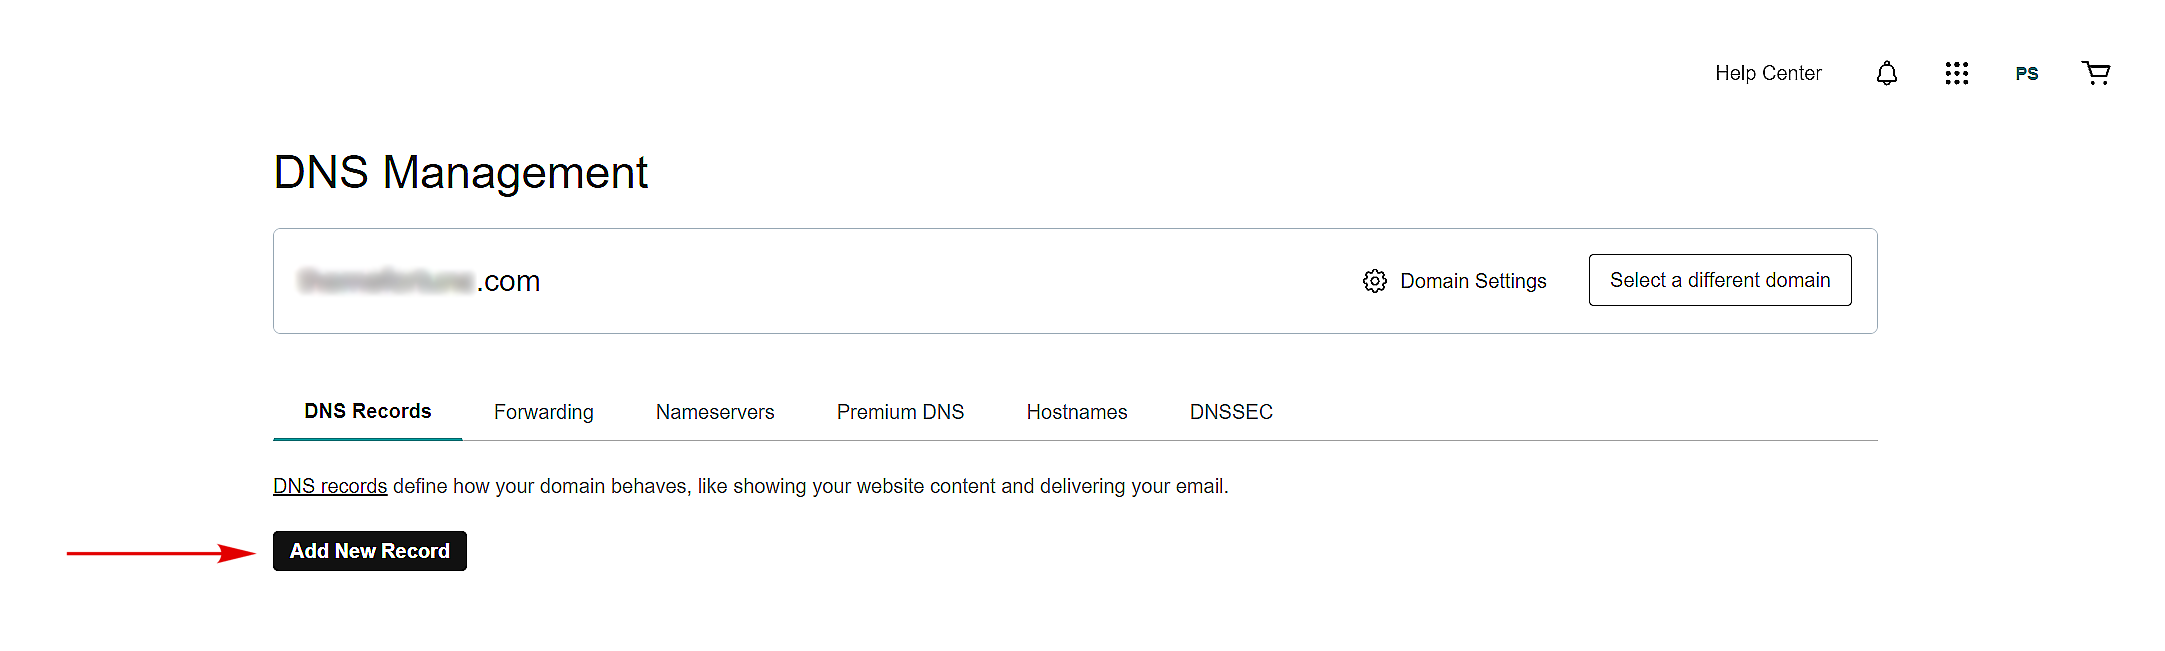
6. On the DNS management page, click the “Add New Record” button as shown below.
7. Now select the record type as TXT, Name as @, and in the Value box paste the copied TXT code from step 3 and leave TTL as it is. Click the “Save” button to update the new TXT record. Check the image below for reference.

8. Now keep on checking your Workspace verification wizard page to see if there is any blue tick (enabled). It should appear within 10 minutes or it might take up to 48 hours for the proper DNS propagation.
18. Activate Gmail Manually (Add MX Records)
Adding Google Workspace MX records to your domain is an important step to ensure that your email is properly routed through Google’s servers. Here’s a general guide on how to do it:
1. Access Your Domain’s DNS Settings
Log in to the website where you registered your domain (like GoDaddy, Bluehost, etc.).
Navigate to the DNS management page. This page might be named something like “DNS Management,” “Name Server Management,” or “Advanced Settings.”
2. Locate the MX Record Section
Within your DNS settings, find the section for MX (Mail Exchange) records. This is where you’ll be making changes.
3. Delete Existing MX Records (If Applicable)
If there are any existing MX records, you might need to delete them to avoid conflicts. However, be cautious; if you’re already using email services with this domain, deleting the MX records will disrupt your current email service.
4. Add Google Workspace MX Records
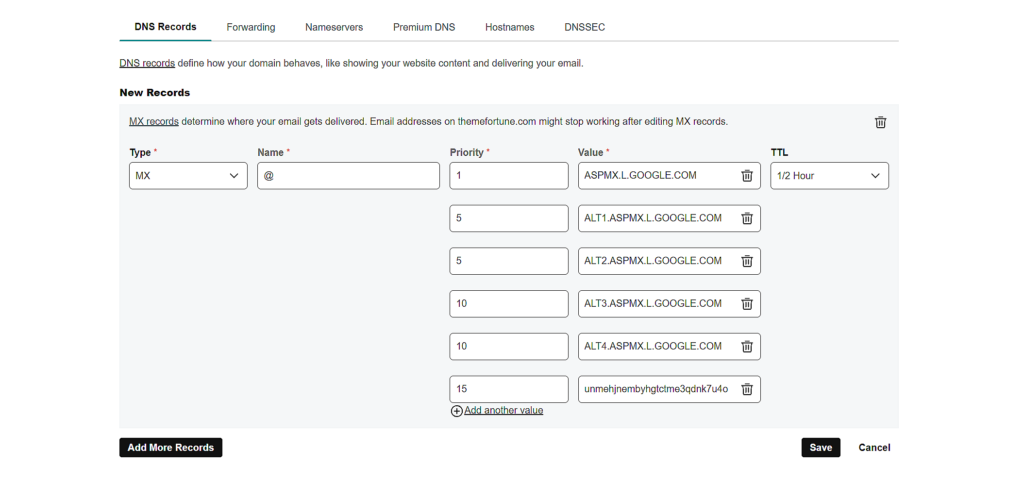
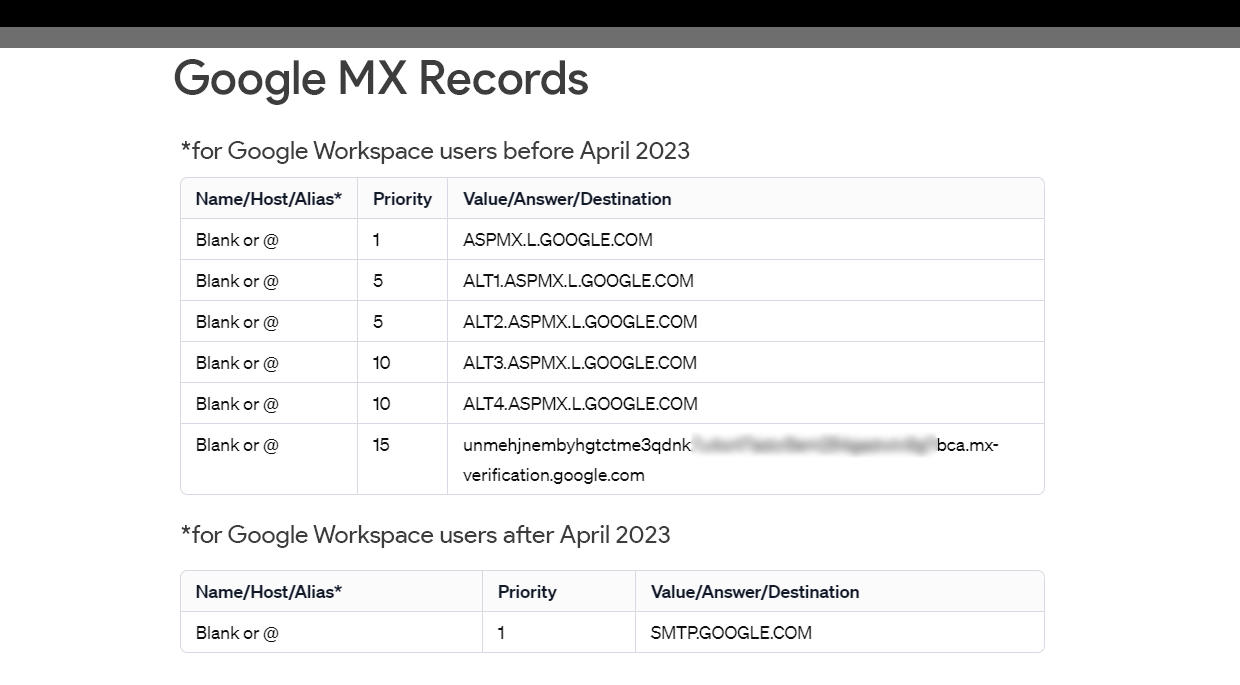
You will need to add several MX records provided by Google. These typically look like this (verify with Google as they may change):
| Value | Name/Host/Alias | Priority |
|---|---|---|
| ASPMX.L.GOOGLE.COM | @ | 1 |
| ALT1.ASPMX.L.GOOGLE.COM | @ | 5 |
| ALT2.ASPMX.L.GOOGLE.COM | @ | 5 |
| ALT3.ASPMX.L.GOOGLE.COM | @ | 10 |
| ALT4.ASPMX.L.GOOGLE.COM | @ | 10 |
| unmehjnembyhgtctme3qdnk7uxxxxxxxxxxxxxxxxxxxxxxxxxxx.mx-verification.google.com (replace this with your unique MX verification code) | @ | 15 |
If you are a Google Workspace subscriber from April 2023 or later. You need to add only one MX record shown below.
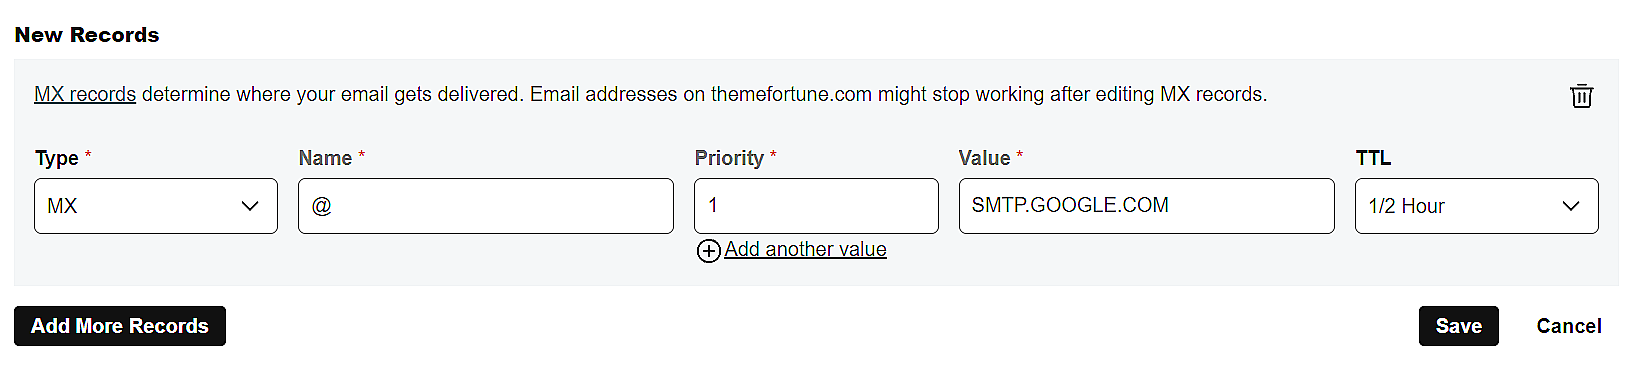
| Value | Name/Host/Alias | Priority |
|---|---|---|
| SMTP.GOOGLE.COM | @ | 1 |
Enter these records one by one. Ensure the priority is set as indicated.
5. Save Your Changes
After entering all the MX records, save your changes. It’s important to ensure that no mistakes are made in the record values or priorities.
6. Verify the Changes
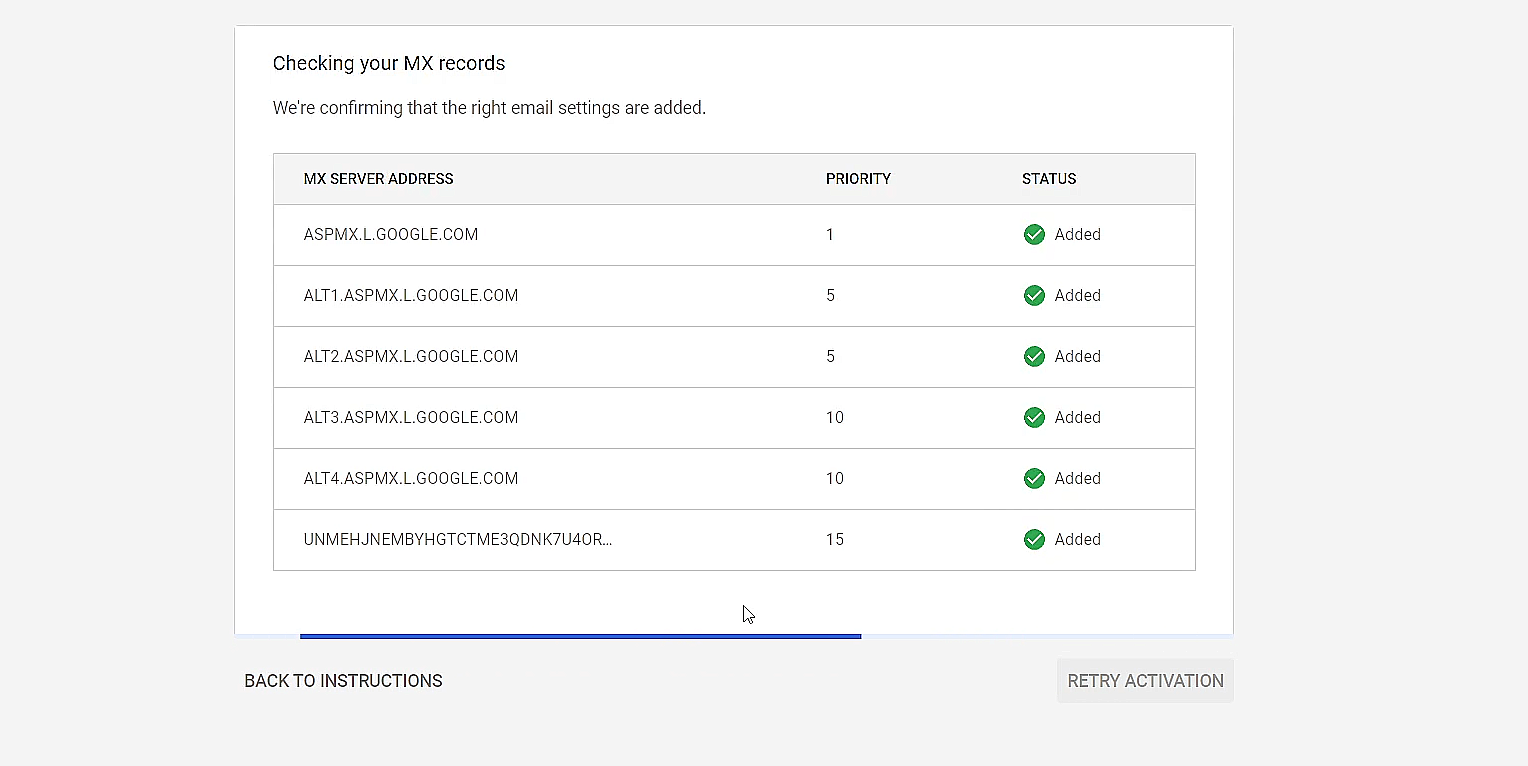
Changes to DNS records can take up to 48 hours to propagate, but it’s often much quicker. You can verify the MX records by refreshing the Wizard page. Additionally, you can check within your Google Workspace admin console to confirm that the MX records are correctly set up.
Additional Tips
- Propagation Time: Remember that DNS changes can take some time to propagate across the internet. So, if the email doesn’t work immediately, give it some time.
- Record Values: Double-check the record values and priorities. A small typo can cause the setup to fail.
- Backup Old Records: If you are replacing old MX records, it might be wise to note them down before deleting, just in case you need to revert.
Test Your First Professional Email
Once the records are updated and propagated, send a test email to your domain’s email address to ensure everything is working correctly.
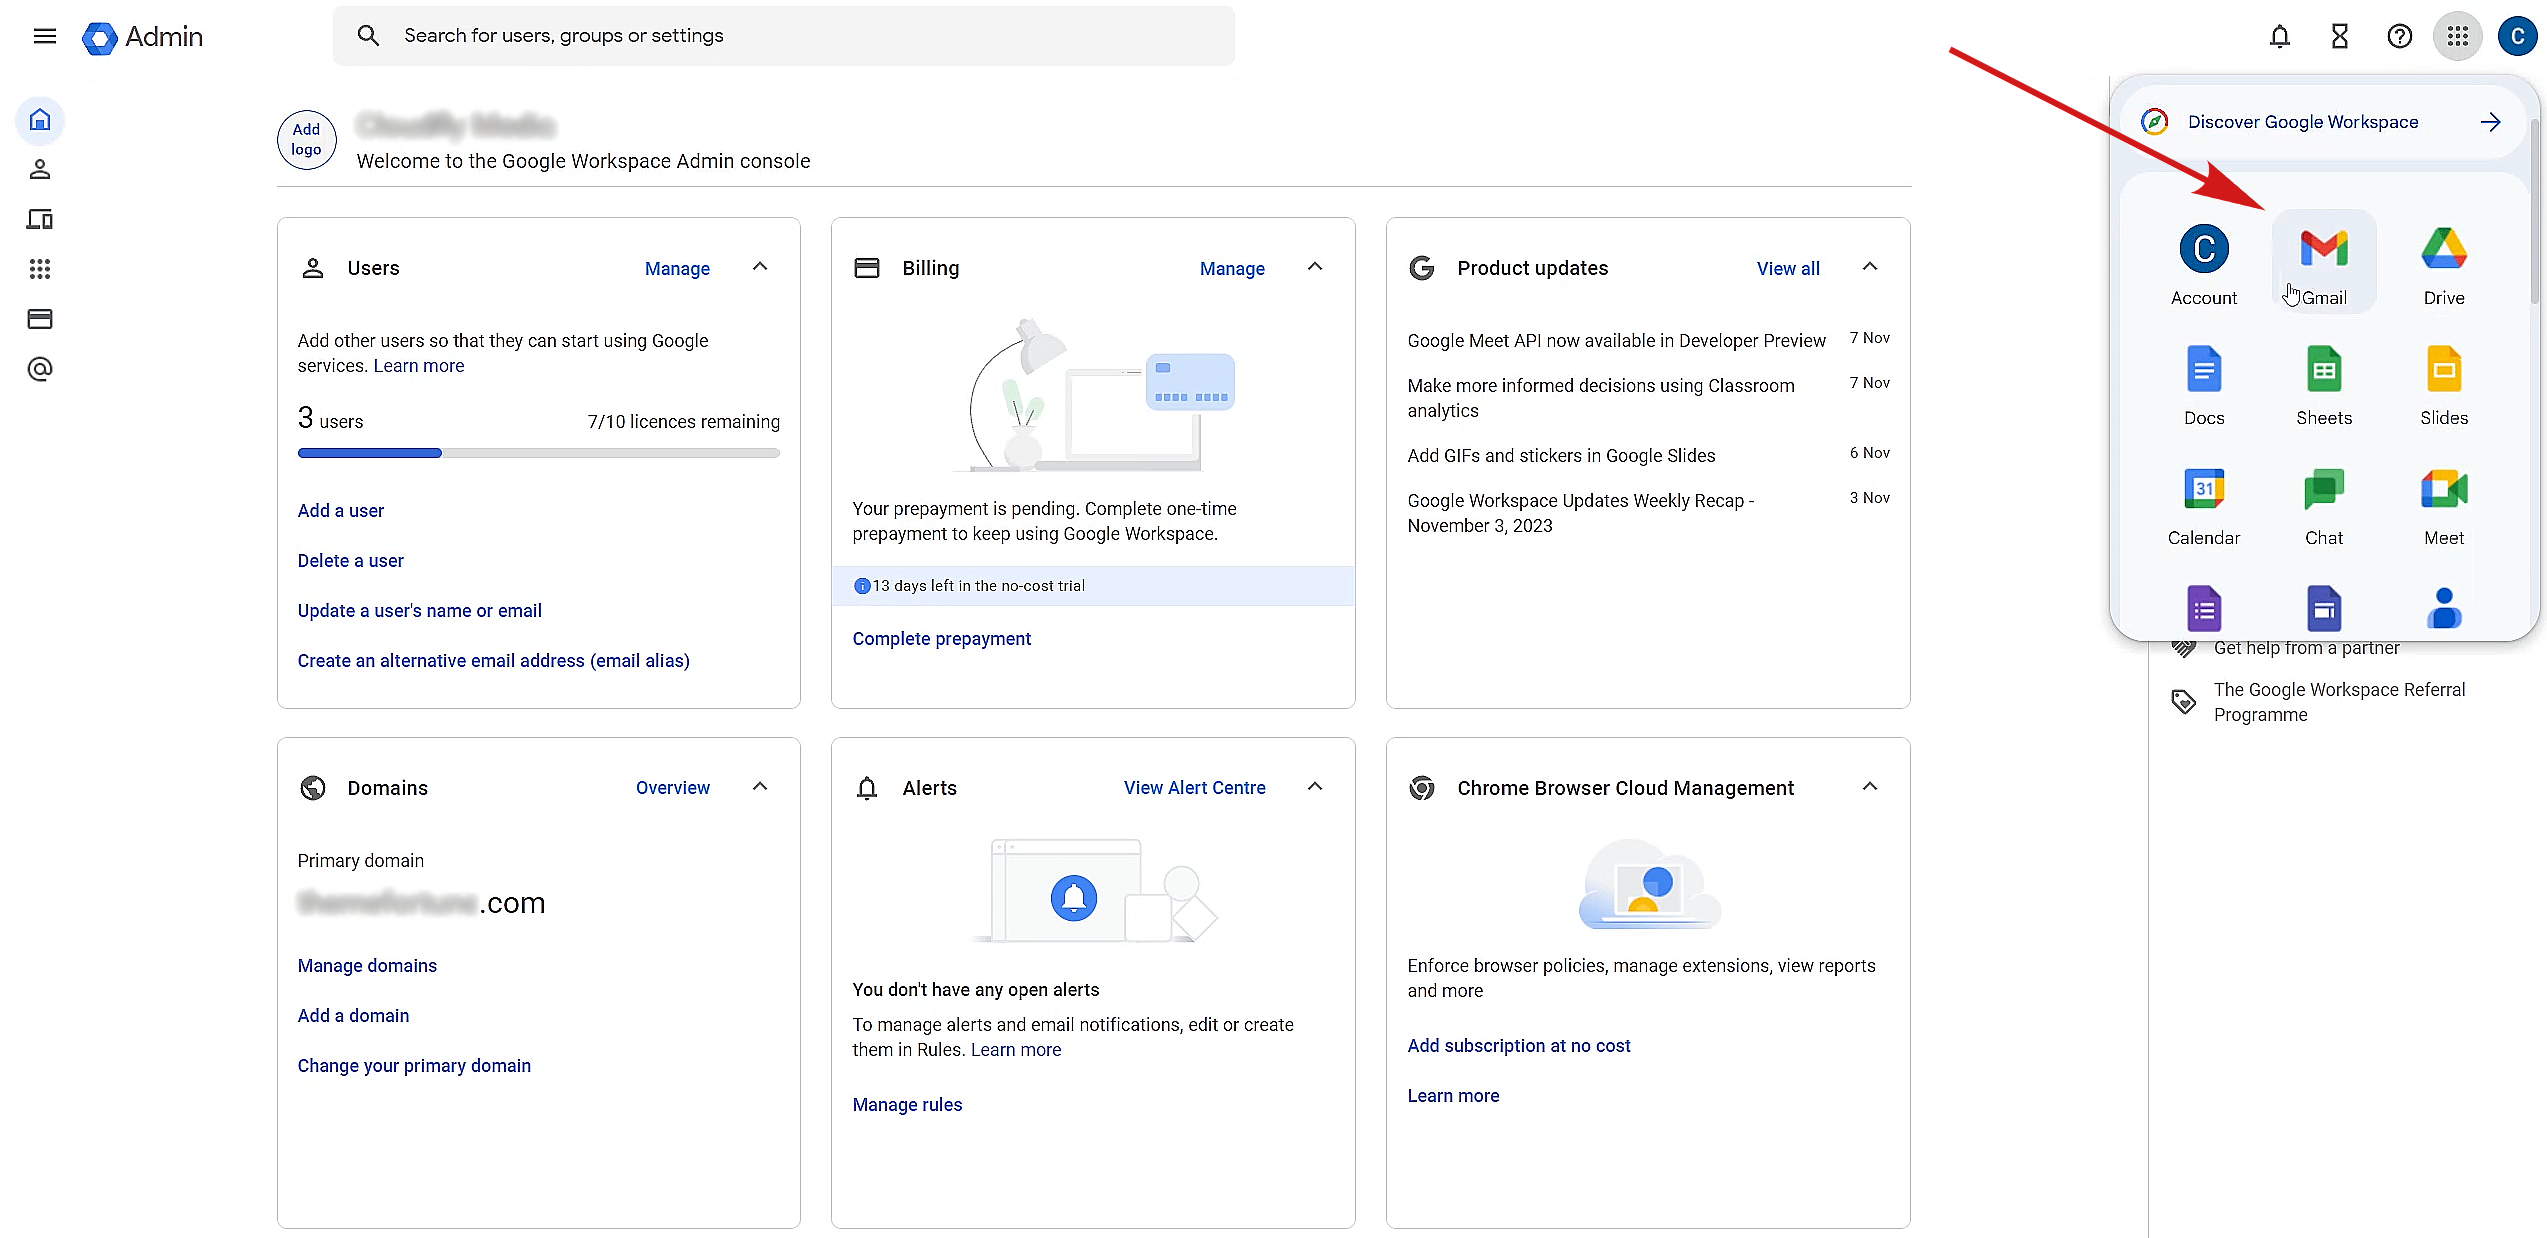
1. Visit the Admin console, and click Gmail from the app’s menu in the top right corner of the page.
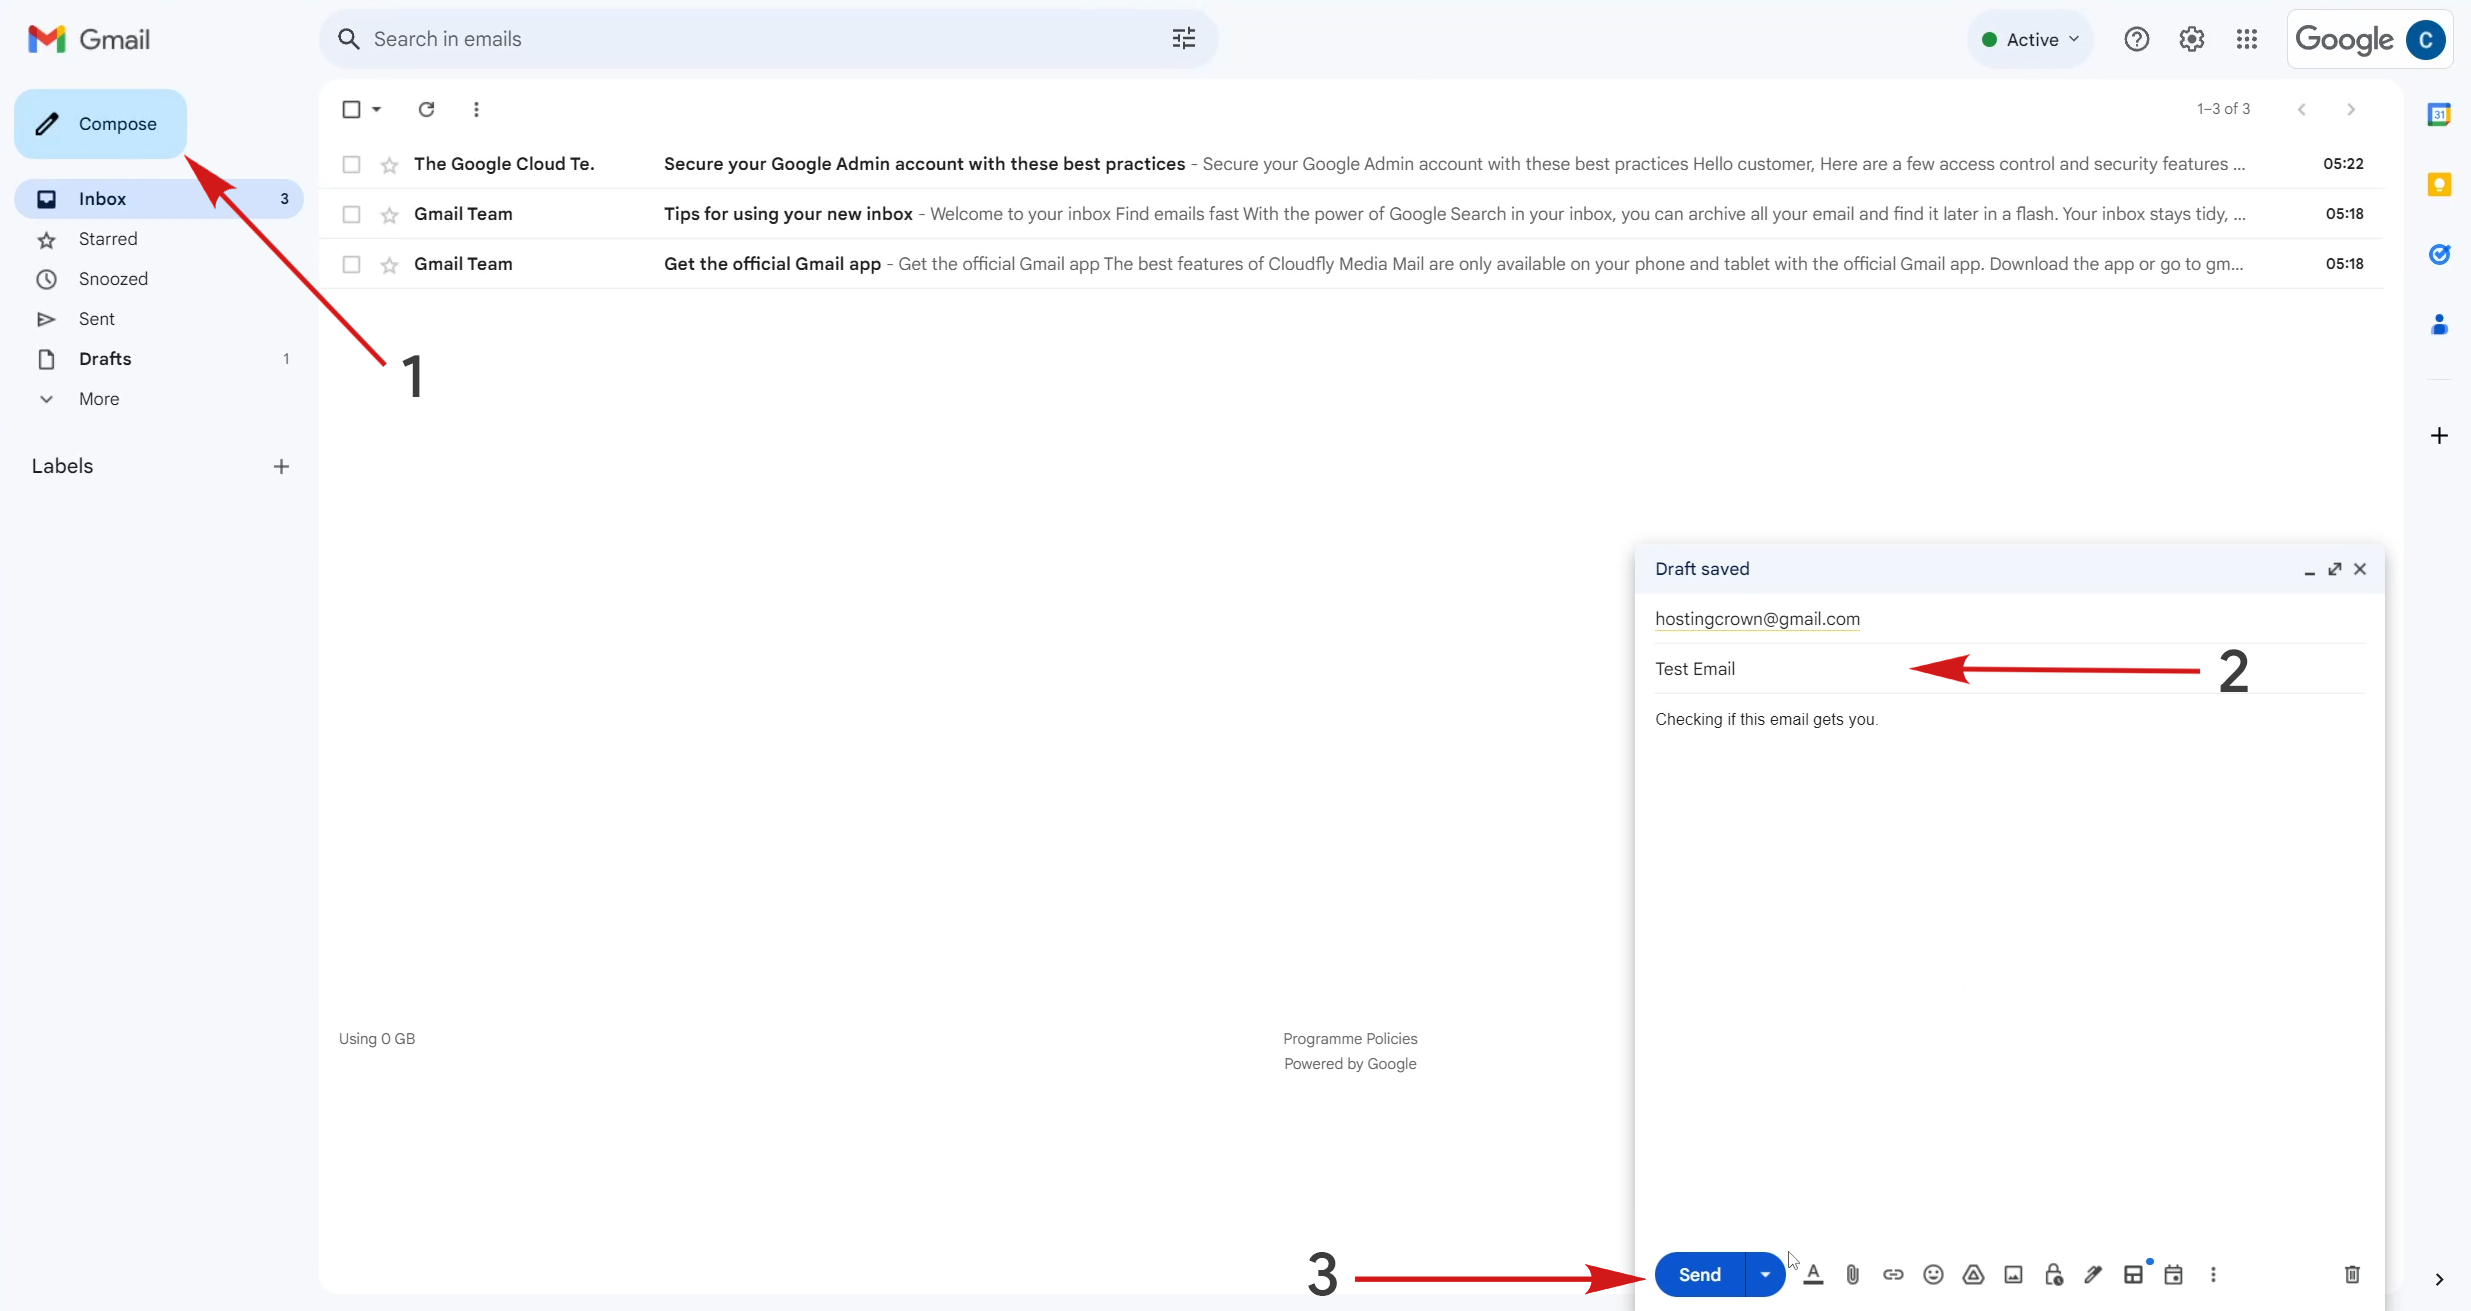
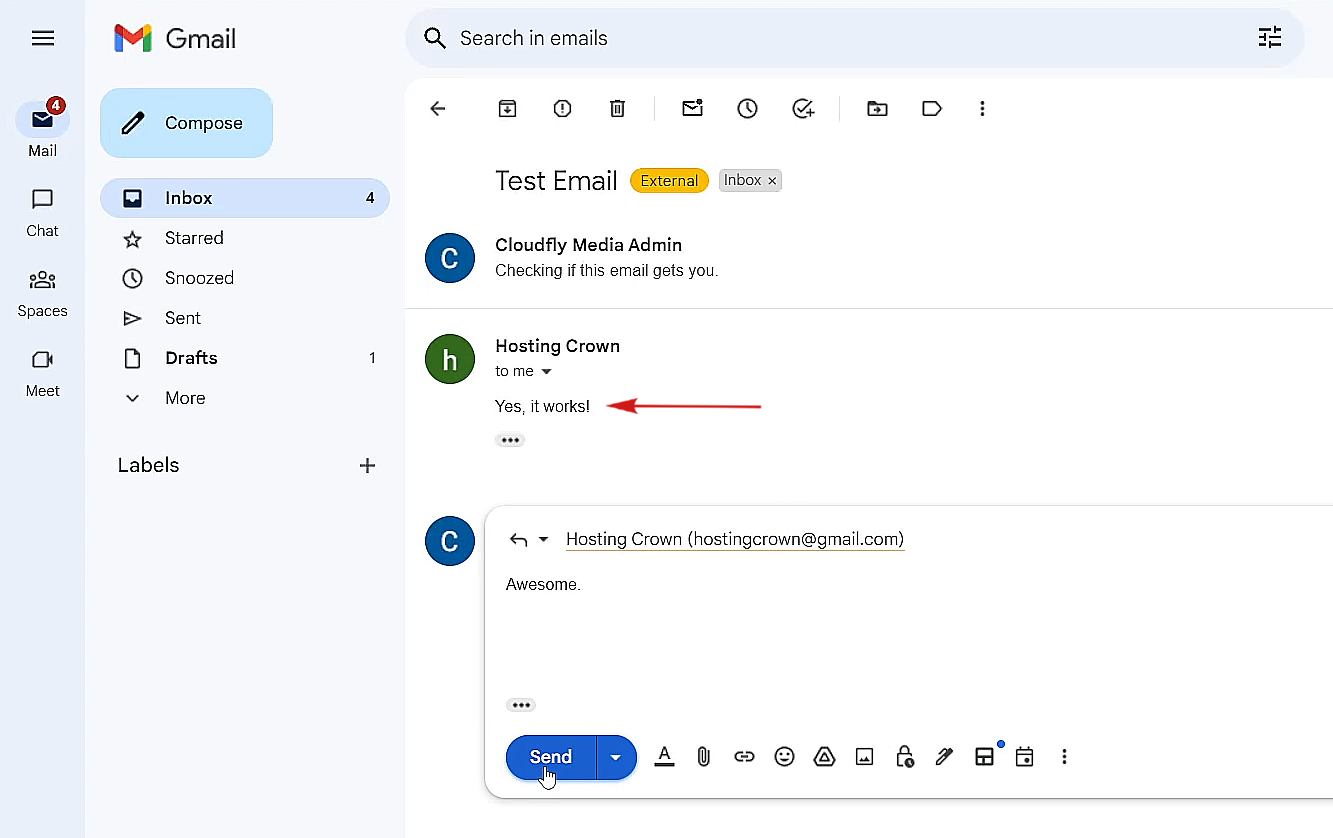
2. On Gmail, click Compose email, write a test email to any of your active email addresses, and finally click Send. Now check if you have received the email you just created in the given email inbox.
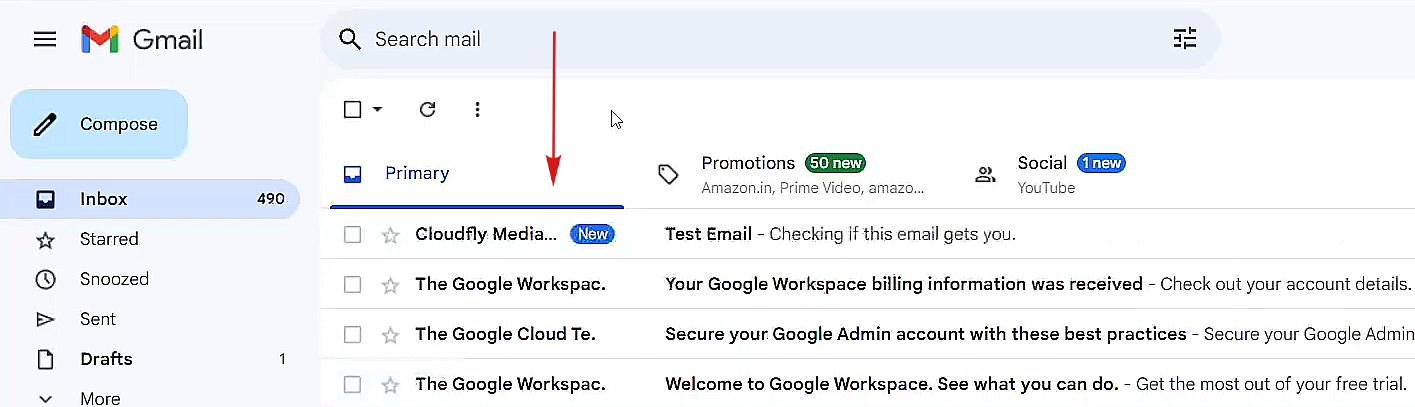
3. It should reach the target and that’s it. It will make sure that your mail was successfully sent. Your professional email service is active.
4. To be on the safer side, also test if you are properly receiving emails. Reply to the same email and check back to your Google Workspace Gmail address.
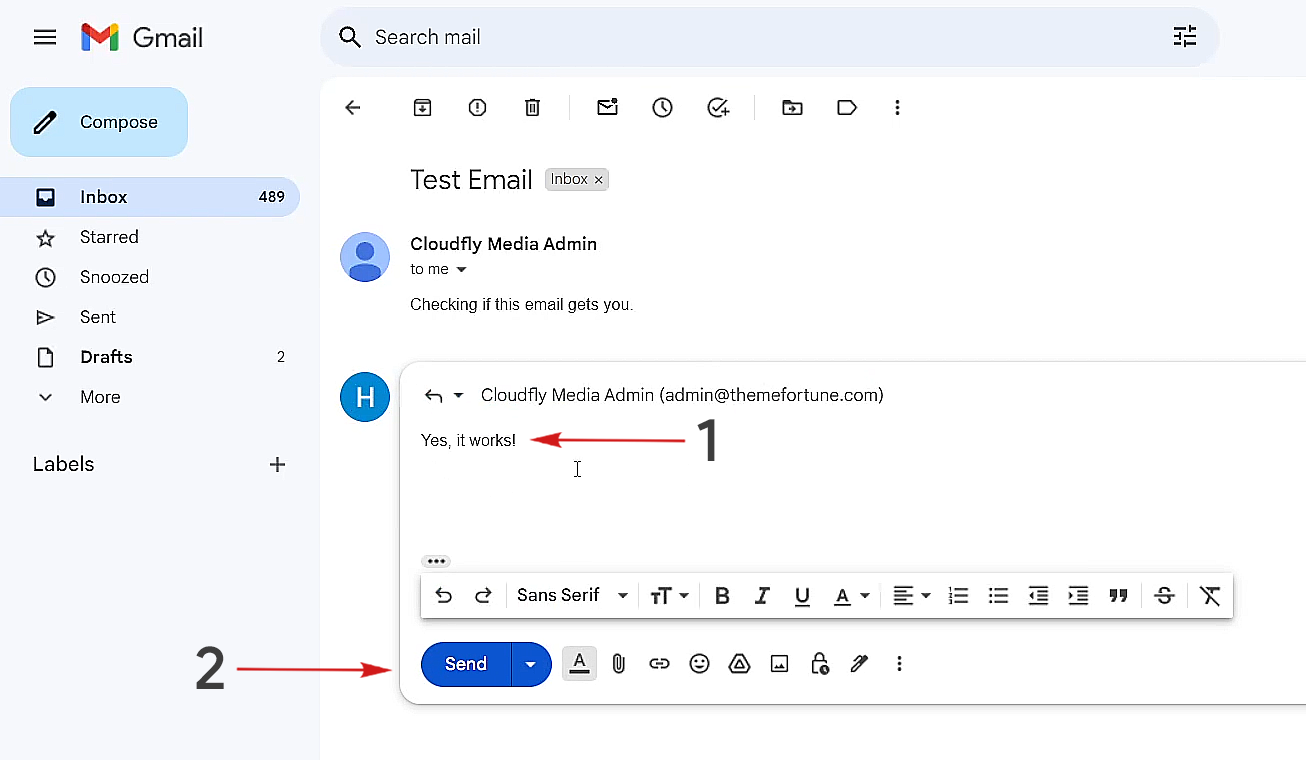
5. Finally, If you receive back that email, you are done with setting up a professional email on Google Workspace.
Setup More Professional Email Addresses
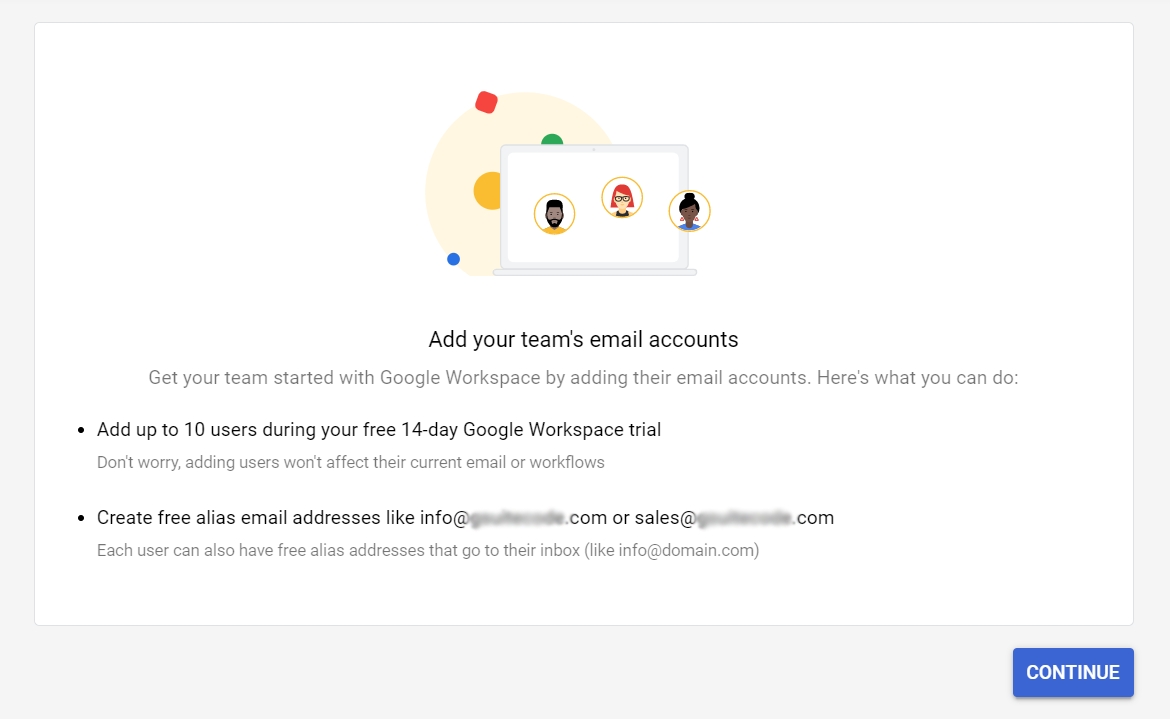
If your business requires more users/teammates to work with, you can add more users for your business such as sales@example.com, and marketting@example.com. If you are on 14 days trial, you can add up to 10 users for free. If you are a paid user, you can make up to 300 professional emails.
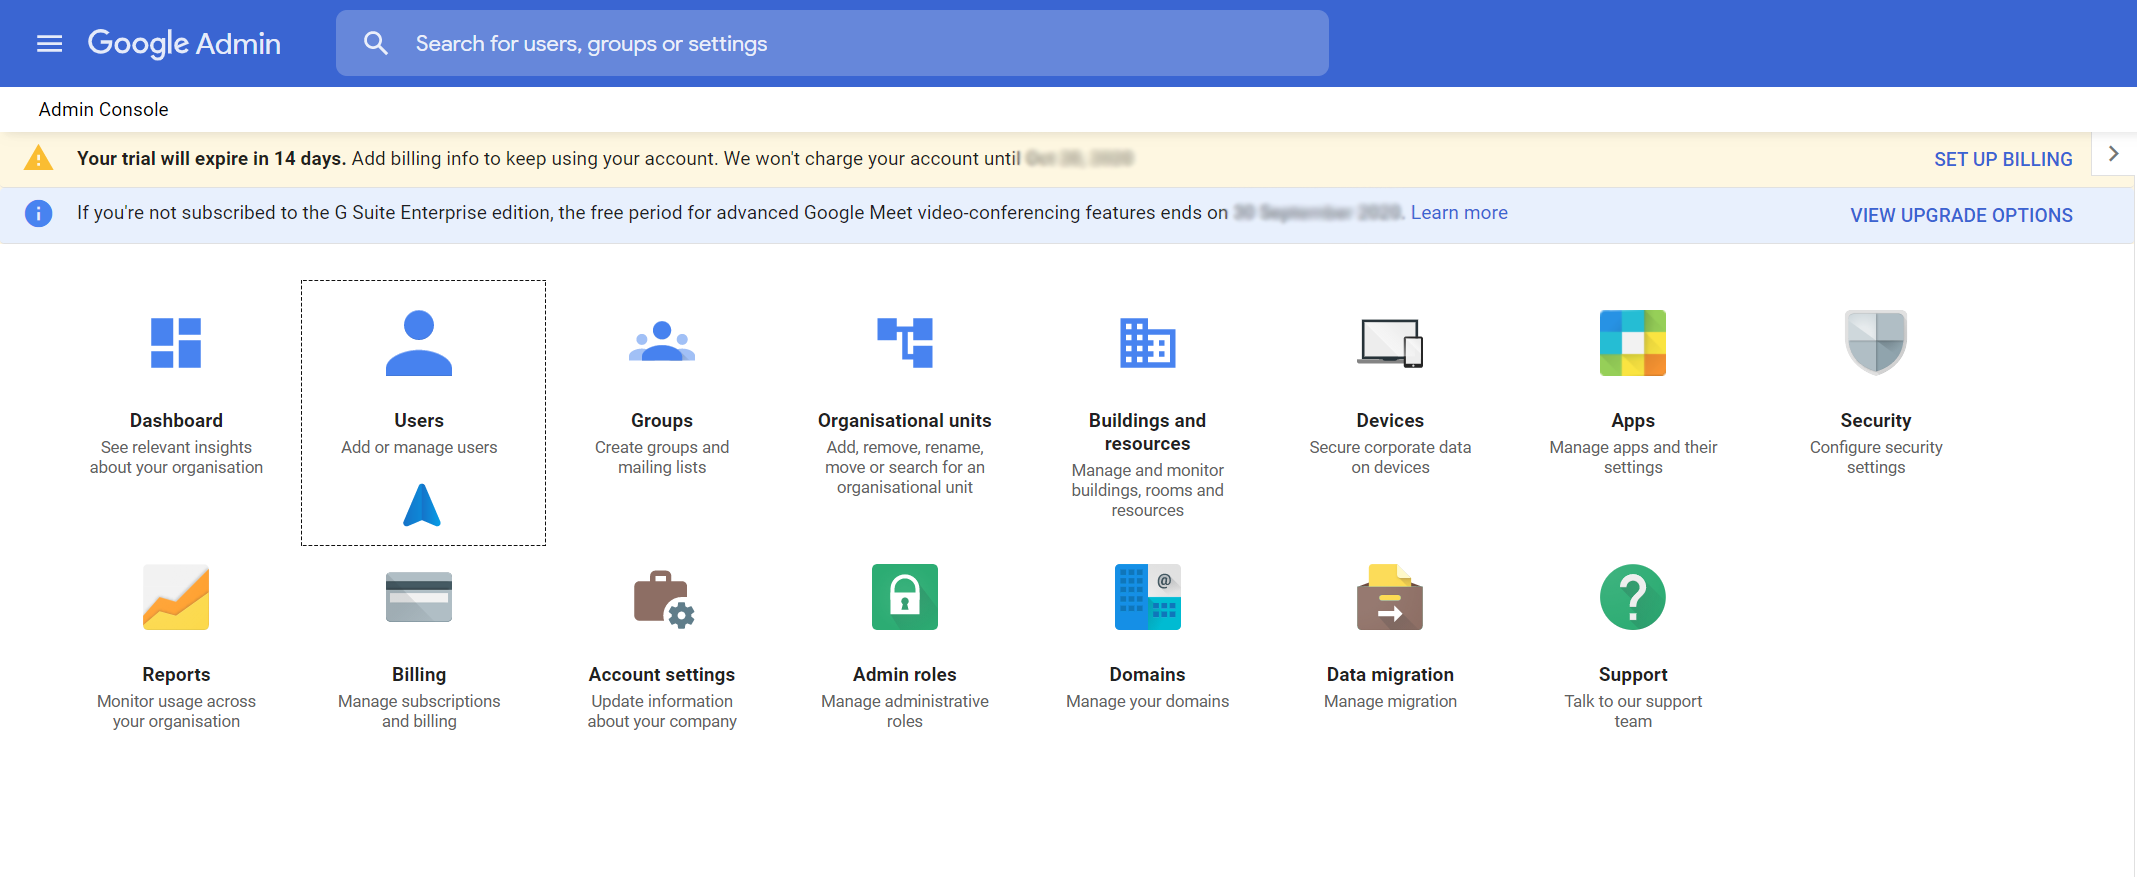
1. To add additional users, log in to your Admin Console → Users
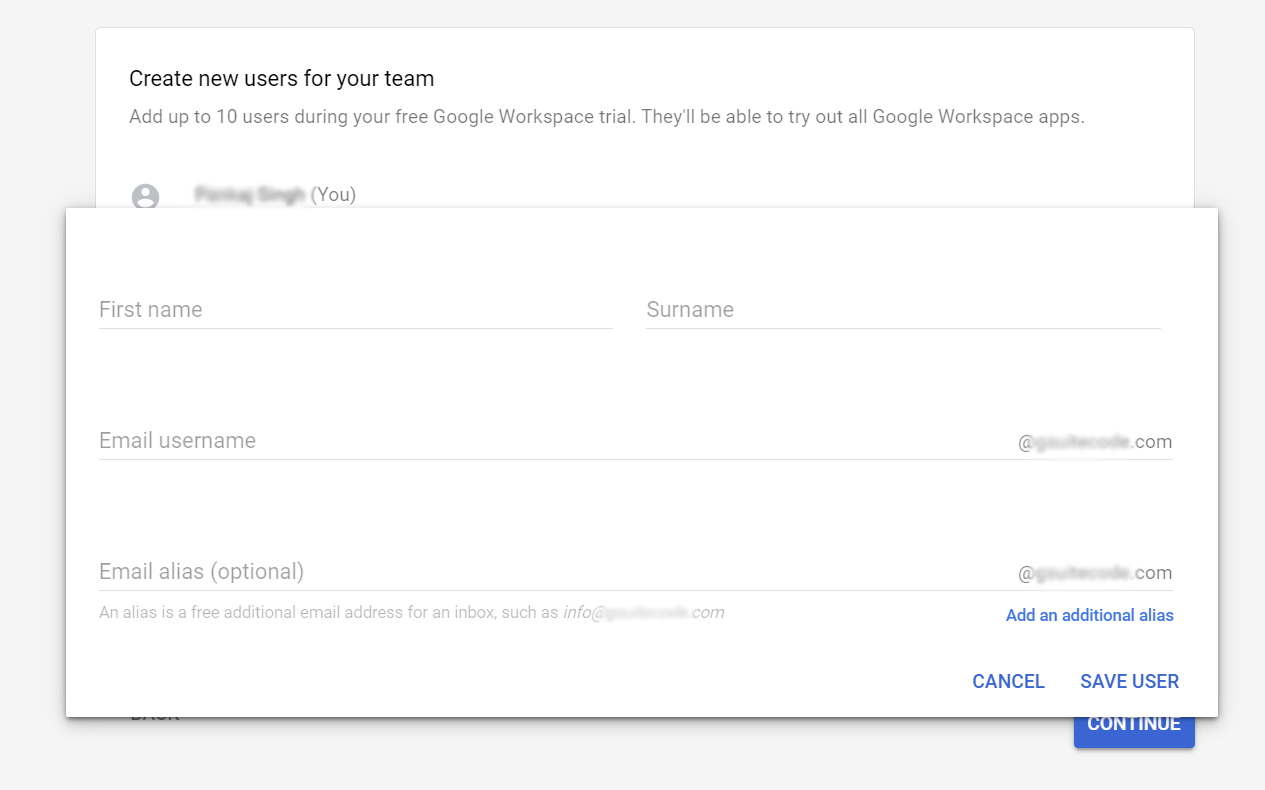
2. Start adding users using their first name, surname, and email address. You can also create up to 30 email aliases per user at no extra cost.
What is an email alias? An email alias is an alternate email address to receive emails to your primary mail address. For example, you can create an email alias sales@example.com for bills@example.com. So every email sent to sales@example.com will be received on bills@example.com. This reduces possible spam and sometimes protects privacy.
Saving 10% Off on Your Professional Gmail
Google Workspace offers an exclusive discount for new businesses to save 10% on each professional email you create for 12 months. You can request discount from us by filling up a form. After you receive a promo code from us, just go to your Admin Console and follow the steps below.
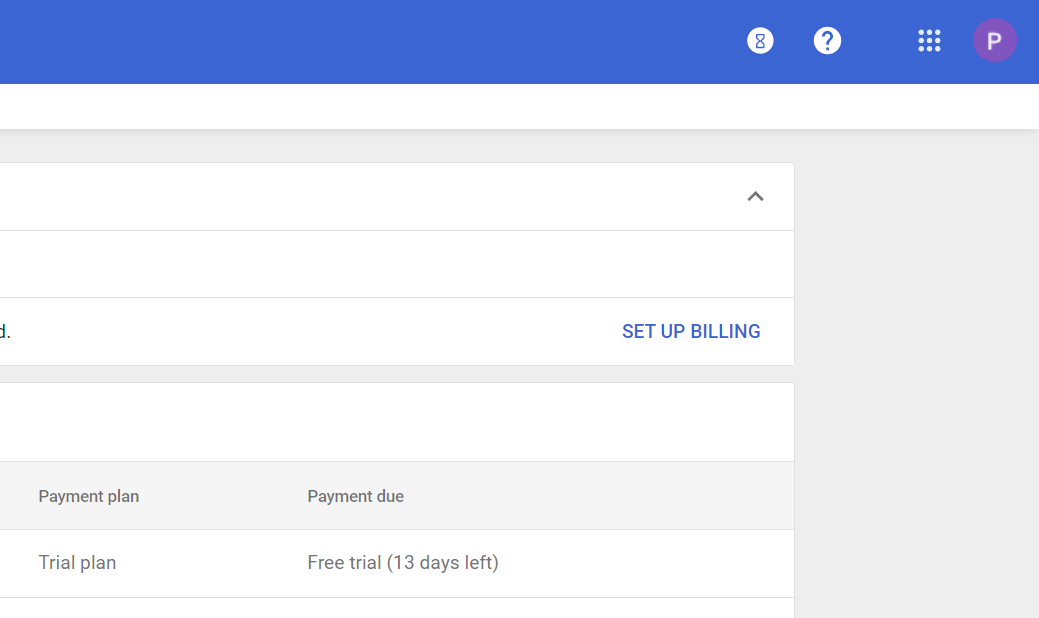
1. Go to the Billing section from your admin console and click Set Up billing
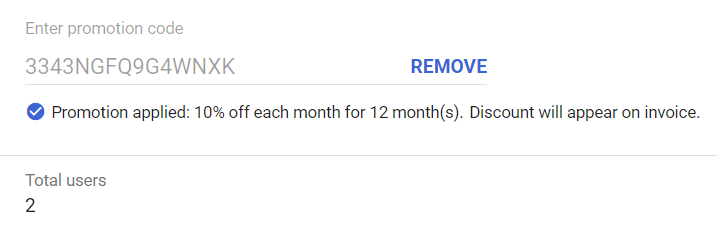
2. Finally, you need to apply your promo code to save 10% of your total subscription bill.
3. Once applied successfully, you will see a confirmation message. If you receive any error, refer to this page to get it fixed.
Finally, pay the final amount using your preferred payment method and you are all done with the setup process.
And that wraps up our guide on setting up your Google Workspace professional email. Congratulations on taking this important step to professionalize your email communication! Remember, the transition to Google Workspace not only gives you a customized email address but also access to a suite of powerful tools that can enhance your productivity and collaboration.
If you’ve followed the steps outlined, your professional email should be up and running smoothly. However, don’t hesitate to reach out for help if you encounter any bumps along the way. Remember, setting up your professional email is just the beginning. Explore the full range of Google Workspace features to maximize the benefits for your business or personal brand.
Thank you for following this guide, and here’s to your success with your new professional email powered by Google Workspace!